
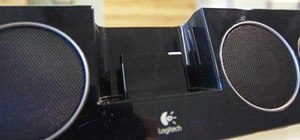
When you're using vacuum power, moving water, or compressing air, it's more than likely being done with some sort of pump. I'll be needing a pump for some of my future projects, so in this tutorial, I'll be showing you how to make your own customizable PVC hand pump that will let you do all three.
Warning
Power tools, like a table saw, pose risks of serious injury. Adequate training and experience are required before operating. The results and claims of this pump are based solely on my personal experiences with the one demonstrated in the video. Individual results may vary. The pump is a simple design and not made, or claimed, to be used in any heavy duty operations, or relatively high pressures. Use of this content is at your own risk.
Prerequisite
A prerequisite to making the pump will be 2 homemade check valves. You can learn how to make these cheap PVC check valves in the following video, or in my previous guide here on WonderHowTo.
Materials
I thought it might be good to build a simple pump, mainly for learning purposes and future projects, and wanted to do it with low-cost materials.
For the pump piston and chamber, I was inspired by a picture I saw in a Google image search by someone who used the 1¼" and 1" sizes of tubes, and he mentioned he cut the grooves for the O-rings on a table saw. That was a new idea to me and gave me the inspiration to put this together.
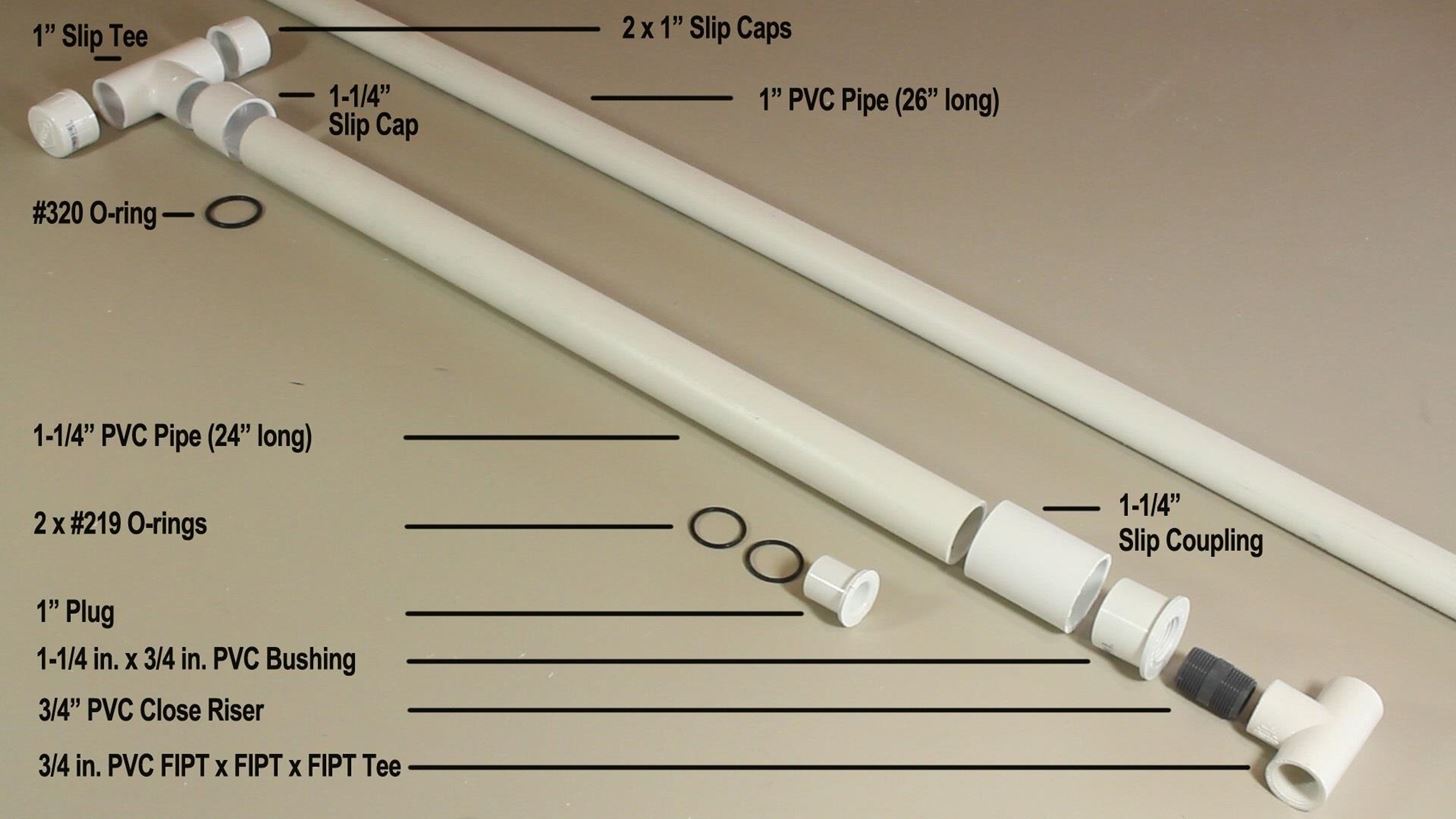
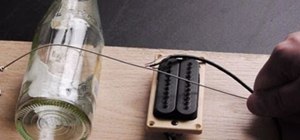
The materials I used are outlined in detail in the picture.
How to Build a PVC Hand Pump
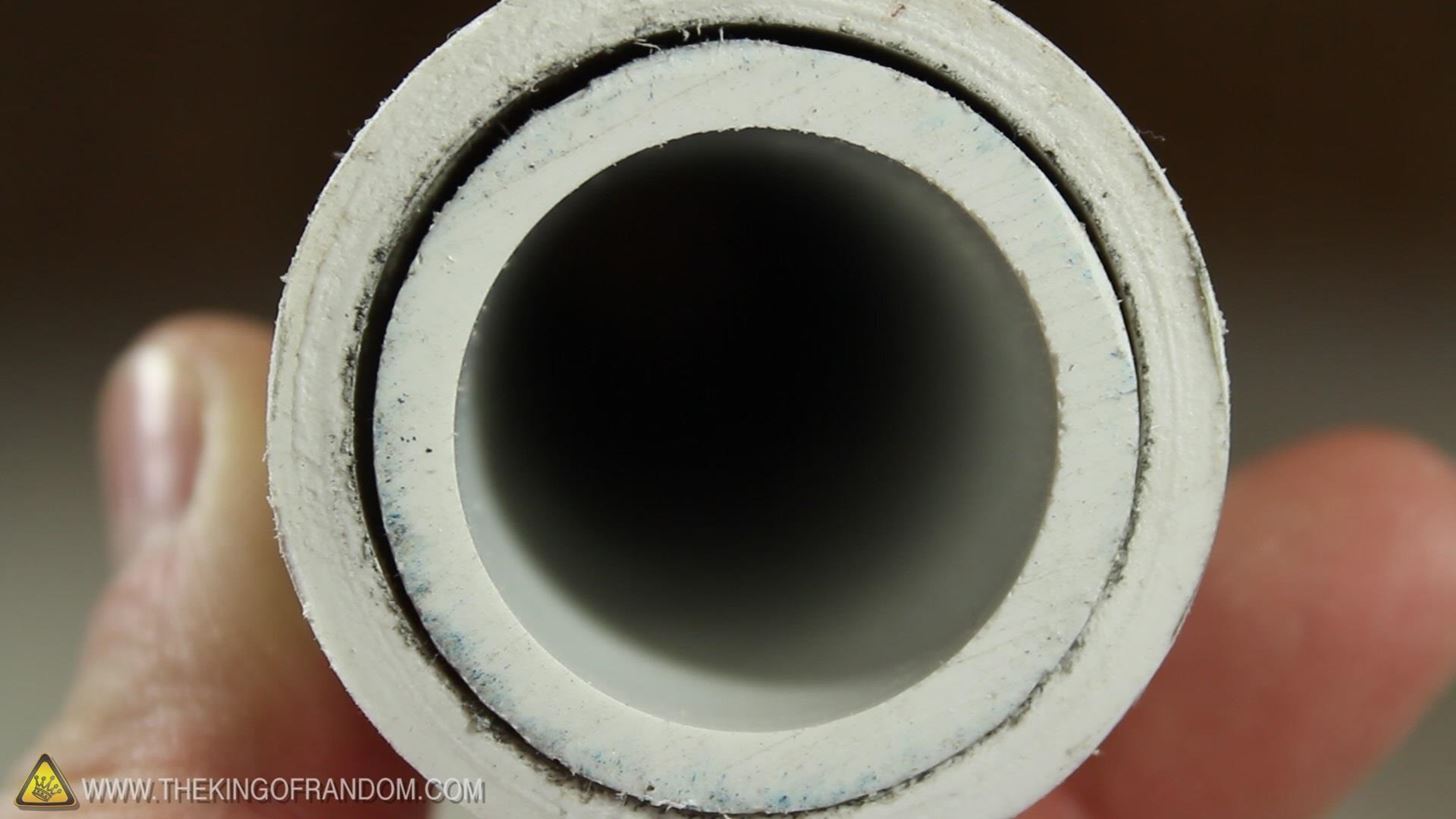
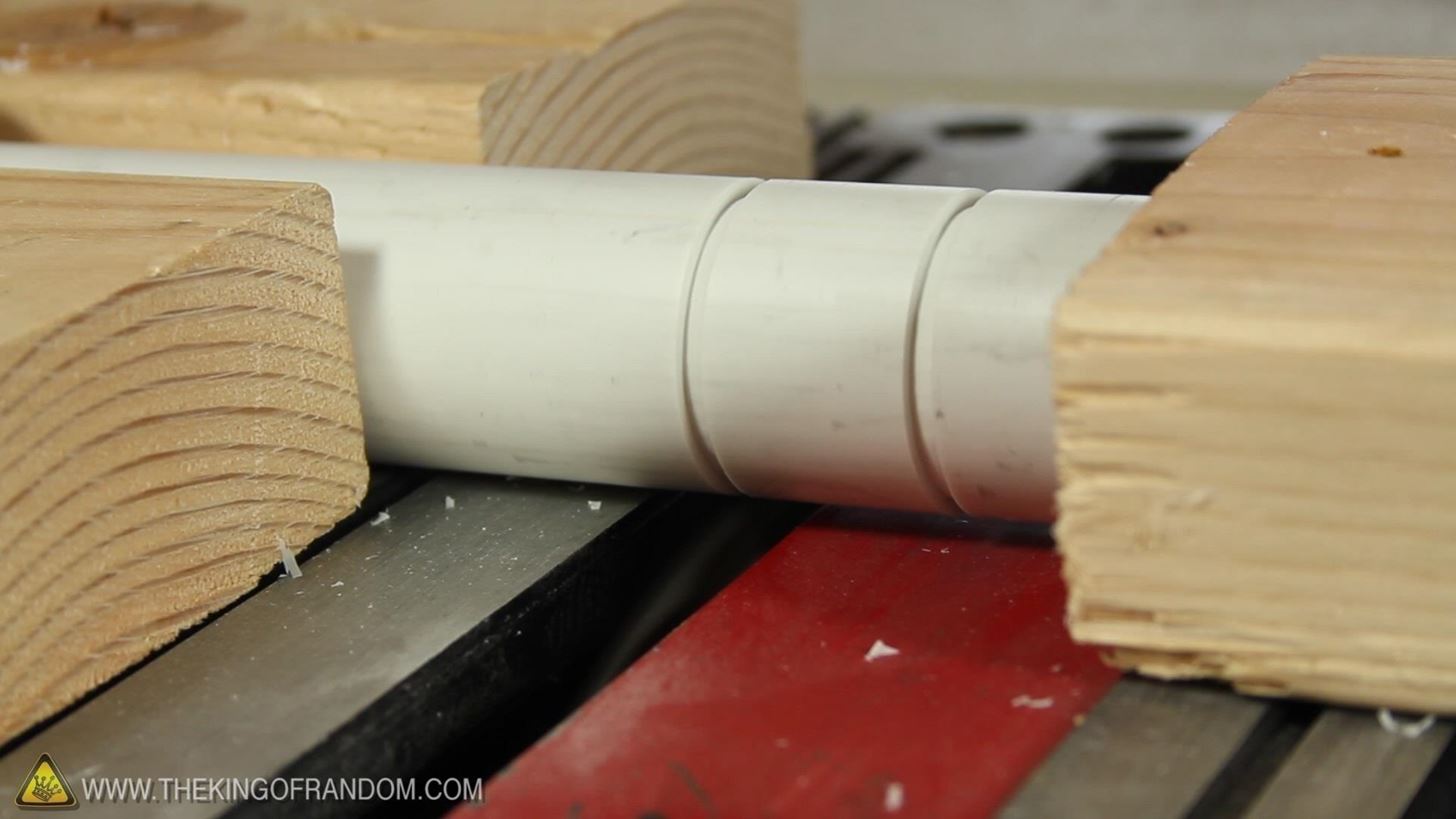
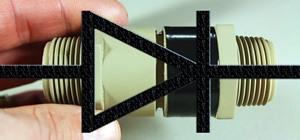
You can see here that the 1" pipe fits closely inside of the 1-1/4" PVC pipe. There is just a little gap, but we actually need this to be air-tight to make a proper piston. The best way that I know of to make an air-tight seal is by using some rubber O-rings.
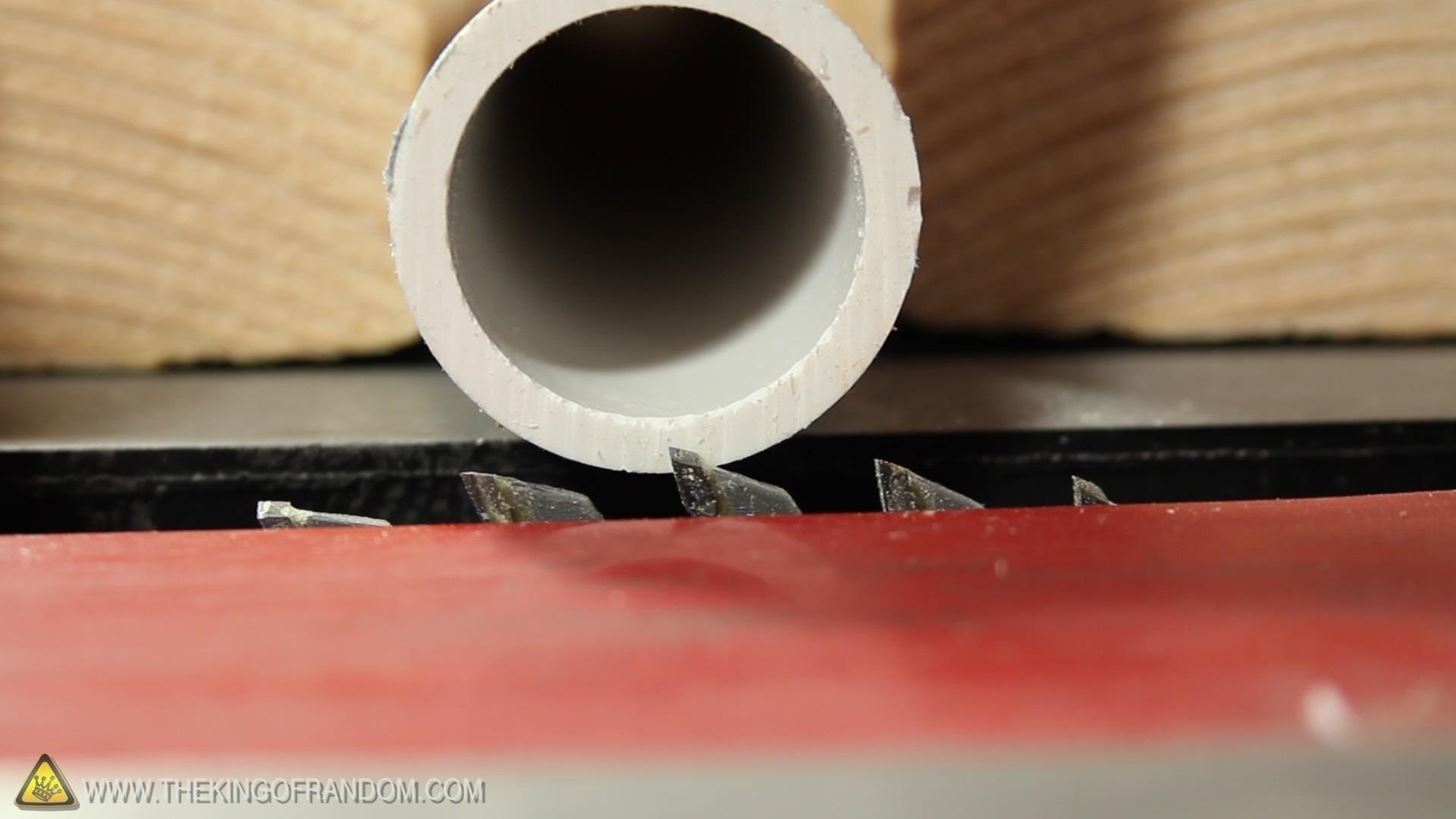
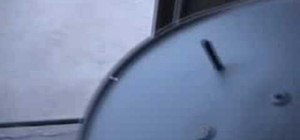
To cut grooves for the rings, I used a table saw, and adjusted the blade by holding the pipe flat on the table top, and lowering the blade until I could see that it would only cut about halfway through the plastic. The goal is to make a nice groove for the O-ring, but not to compromise the structural integrity of the PVC pipe too much.
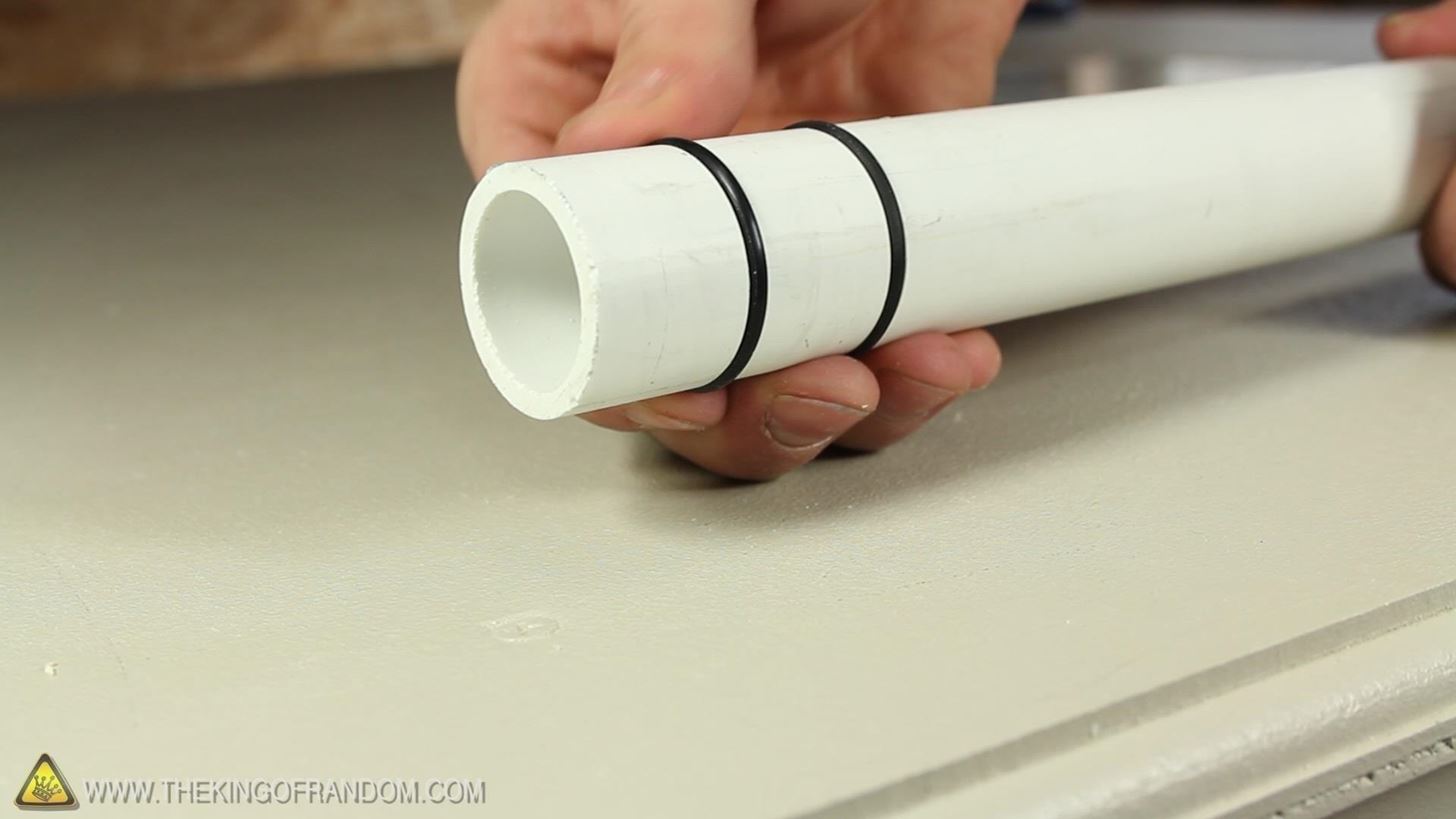
I cut 2 grooves for redundancy. One at 1", and another at 2" marks.
I used some wooden braces to keep the pipe steady, and made the cuts by using one hand to hold the pipe on the blade, and the other hand to rotate the pipe slowly. Of course safety and caution are top priorities when working around power tools and open cutting blades.
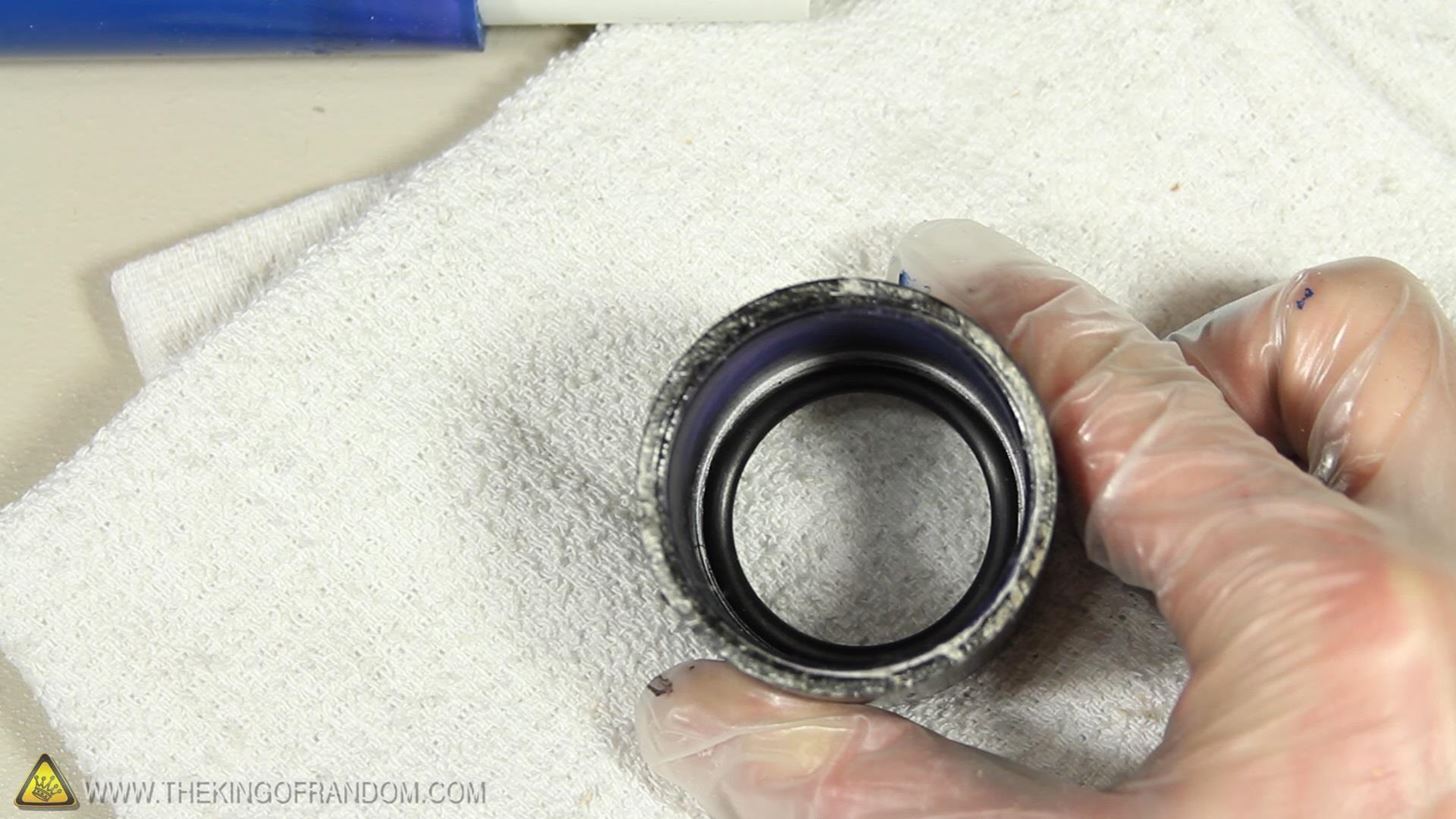
The O-rings fit perfectly into place.
This end of the pipe also needs to be capped off to seal it air tight.
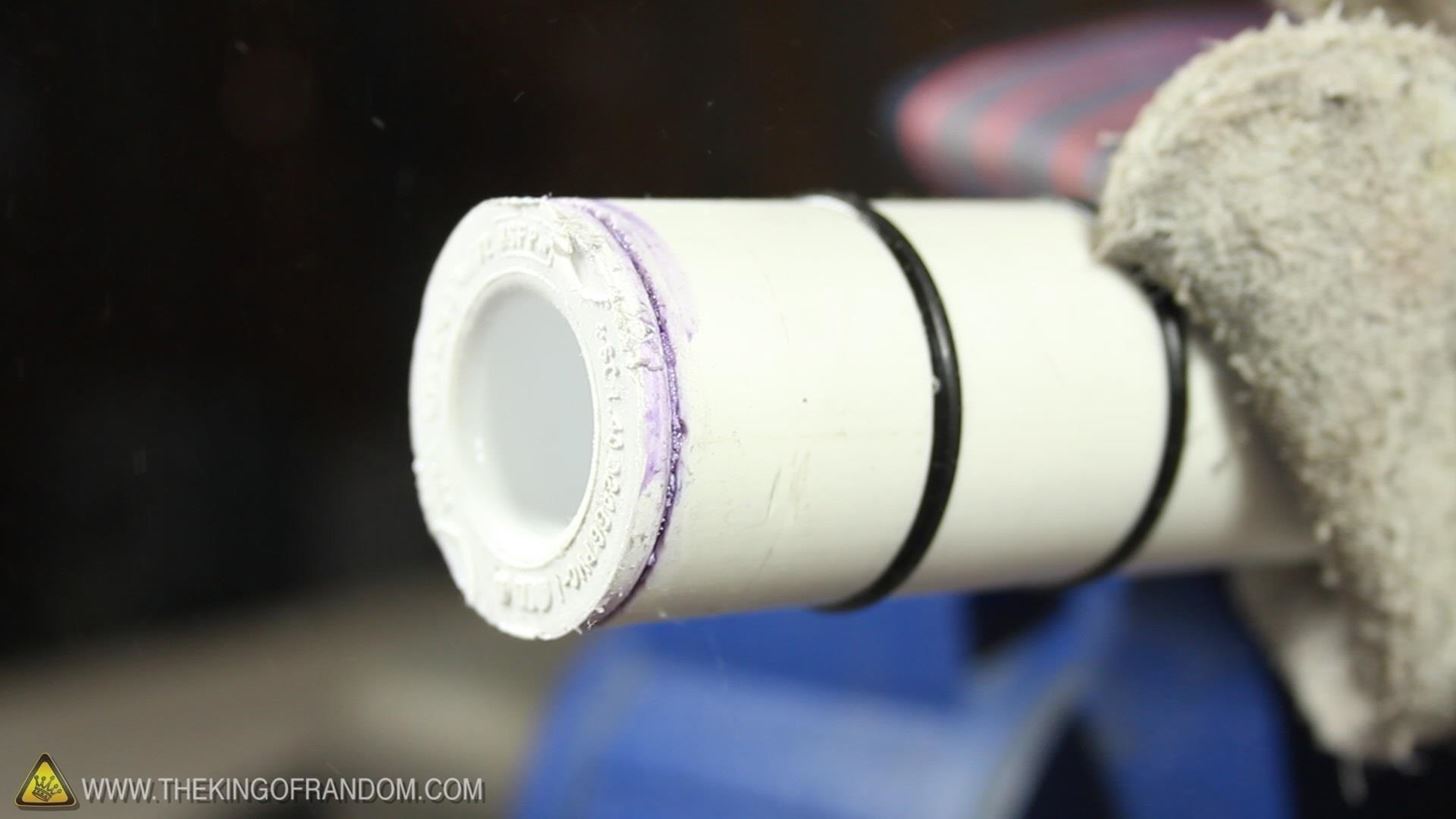
You can't really tell in the picture, but I've glued on an end plug that is solid. In the diagram I said it was a 1" plug, but in reality it was a ¾" plug that I sanded down to fit inside the end of the 1" pipe.
Now this end of the tube is completely sealed. To finish the piston, we need to do a little work on the exterior tube.
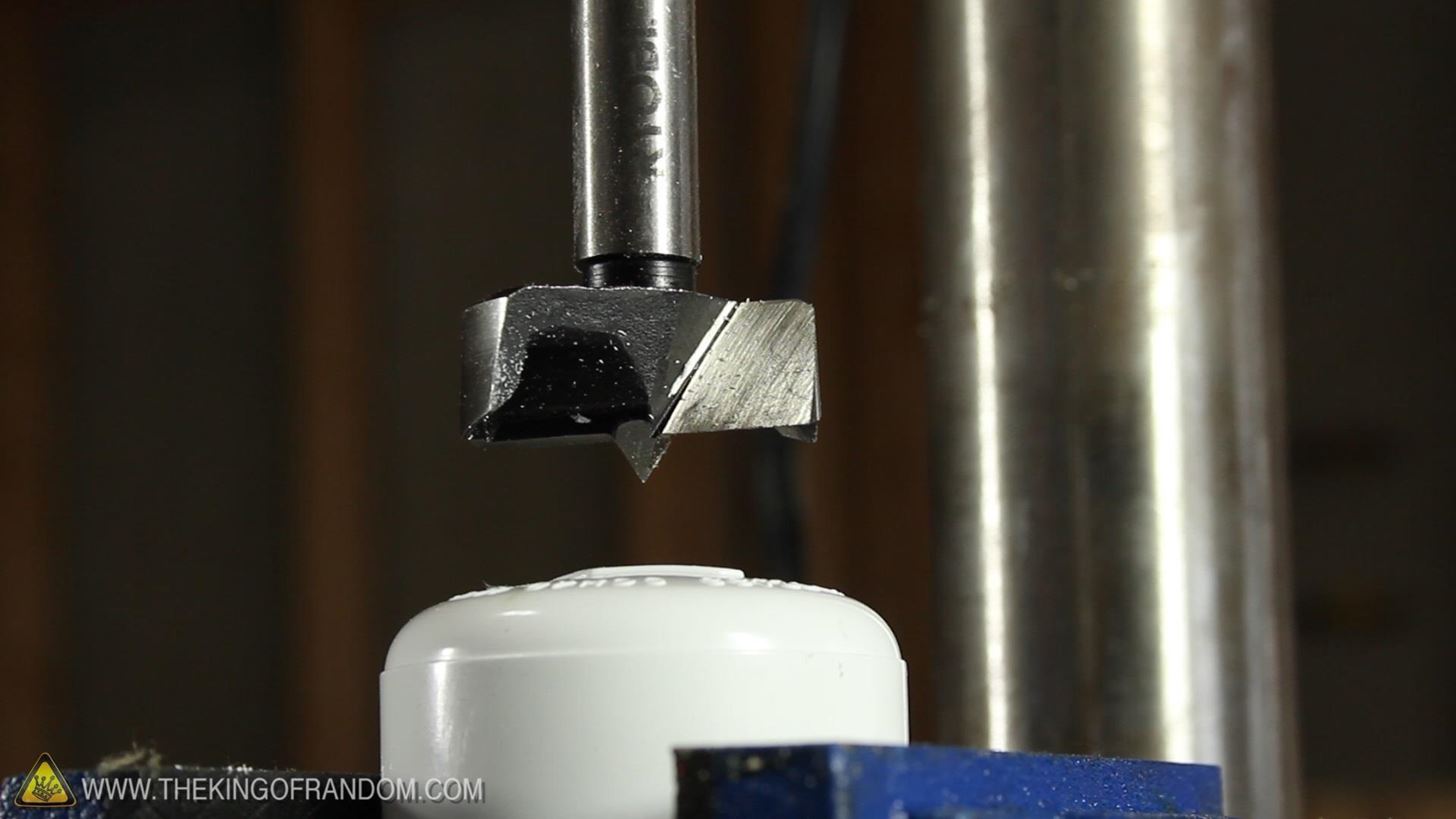
I got a 1¼" slip cap and used a 1-3/8" forstner bit to drill a hole in the center.
An O-ring was added into the inside of the cap around the hole, and put to the side for a minute.
To insert the piston, the O-rings need some lubrication, or the friction on the inside walls of the pipe will damage them. I used Vaseline, but some people have suggested Vaseline will eat the O-rings over time, and that some type of silicon grease would be better.
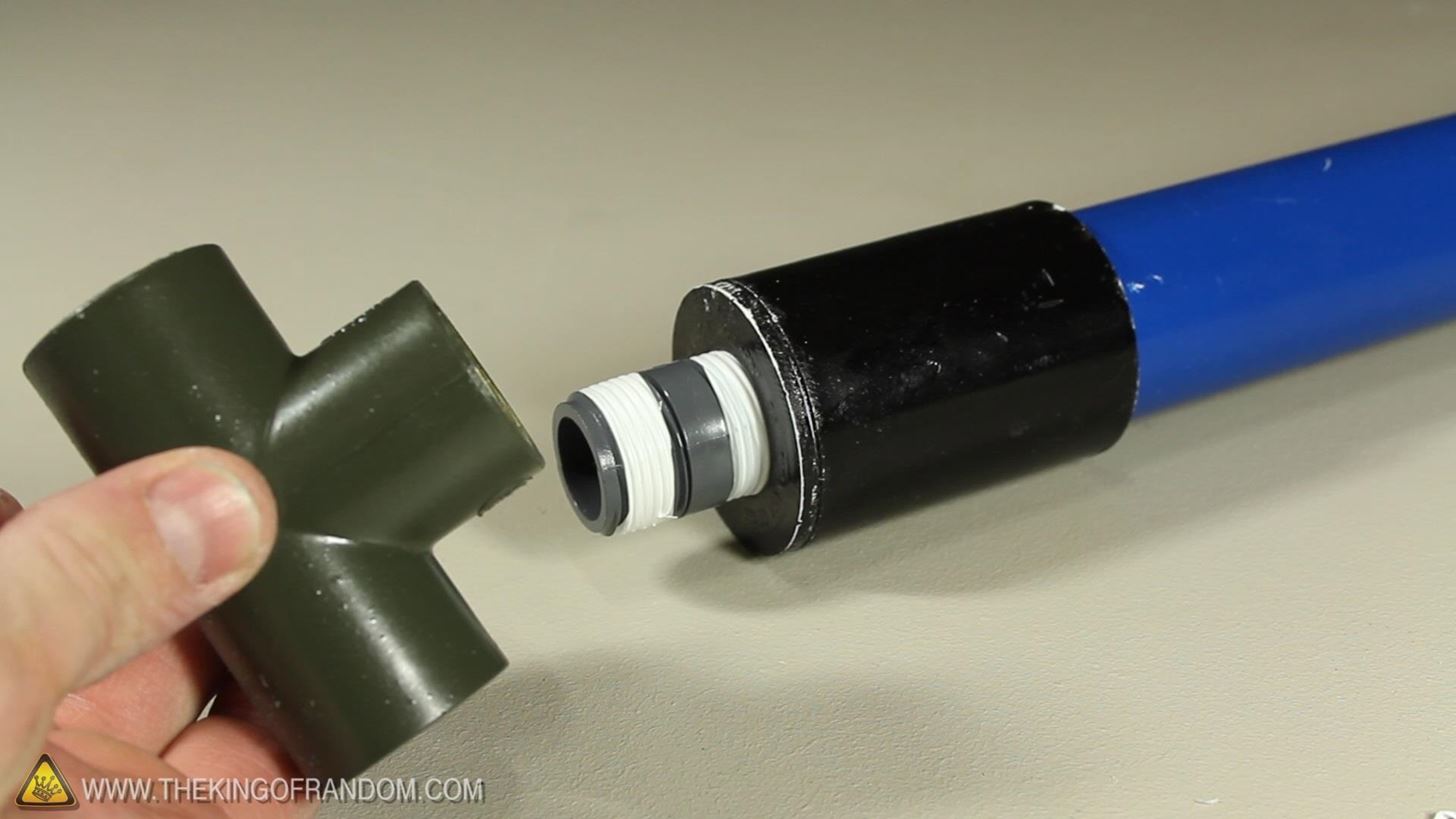
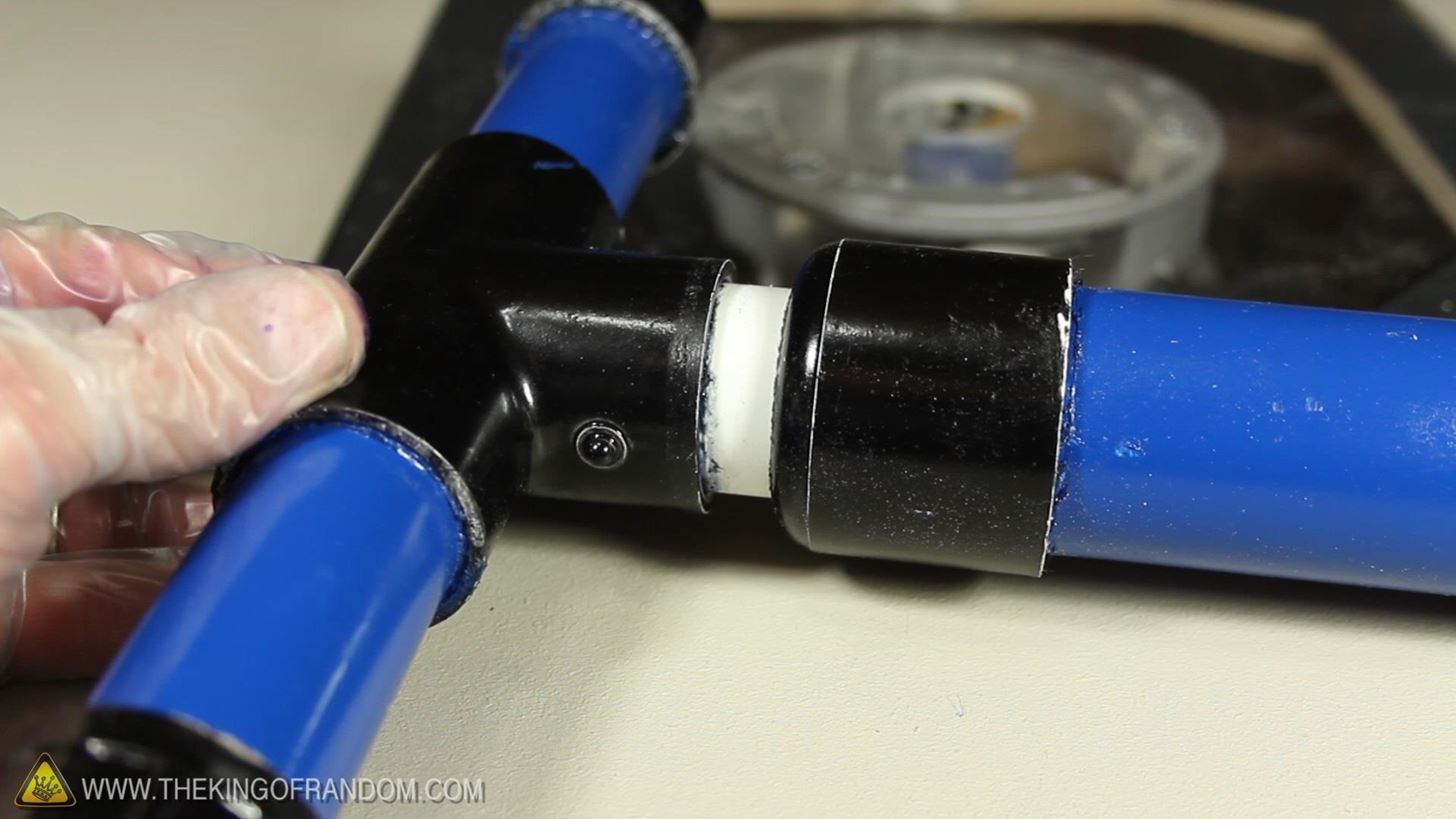
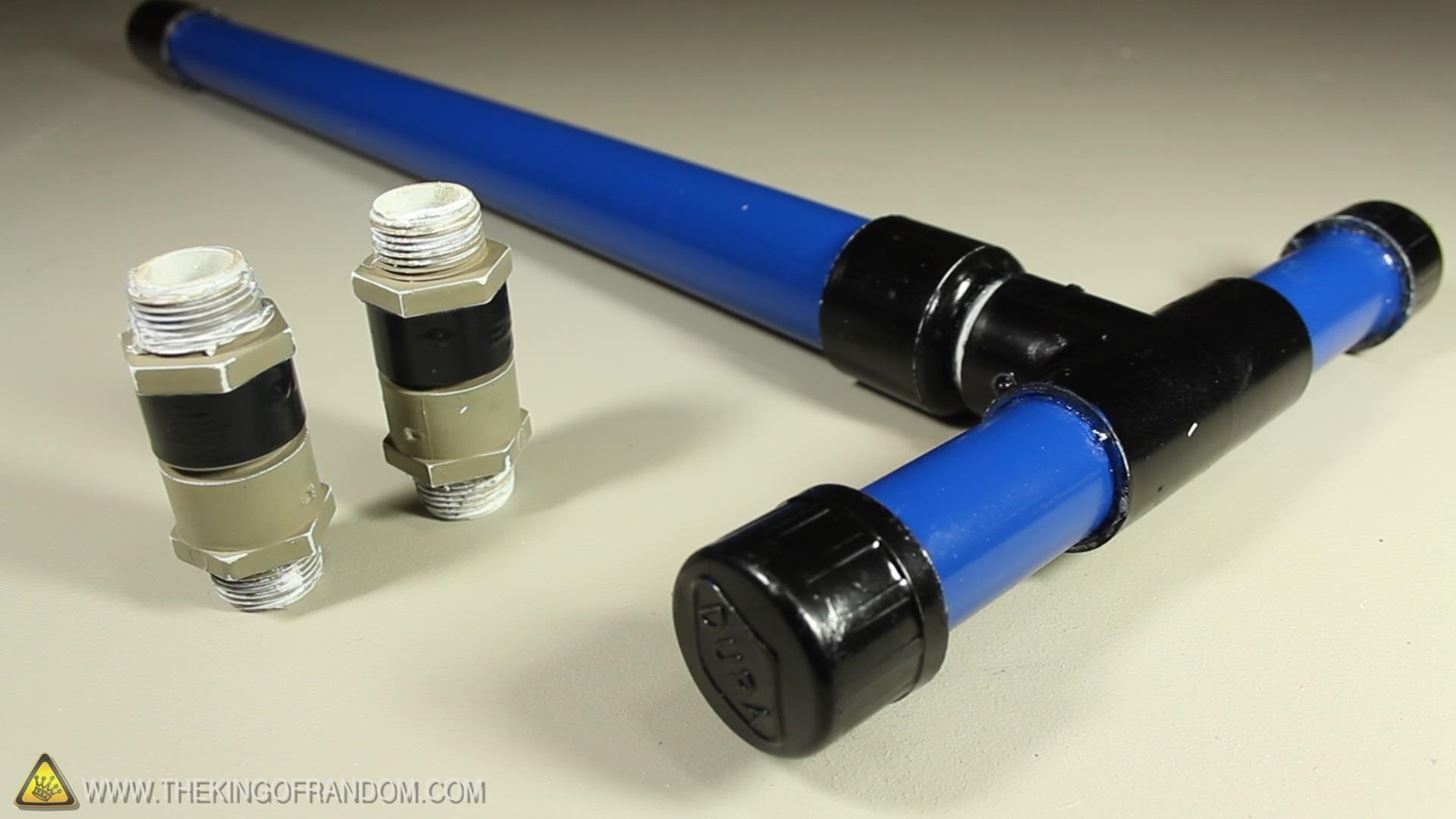
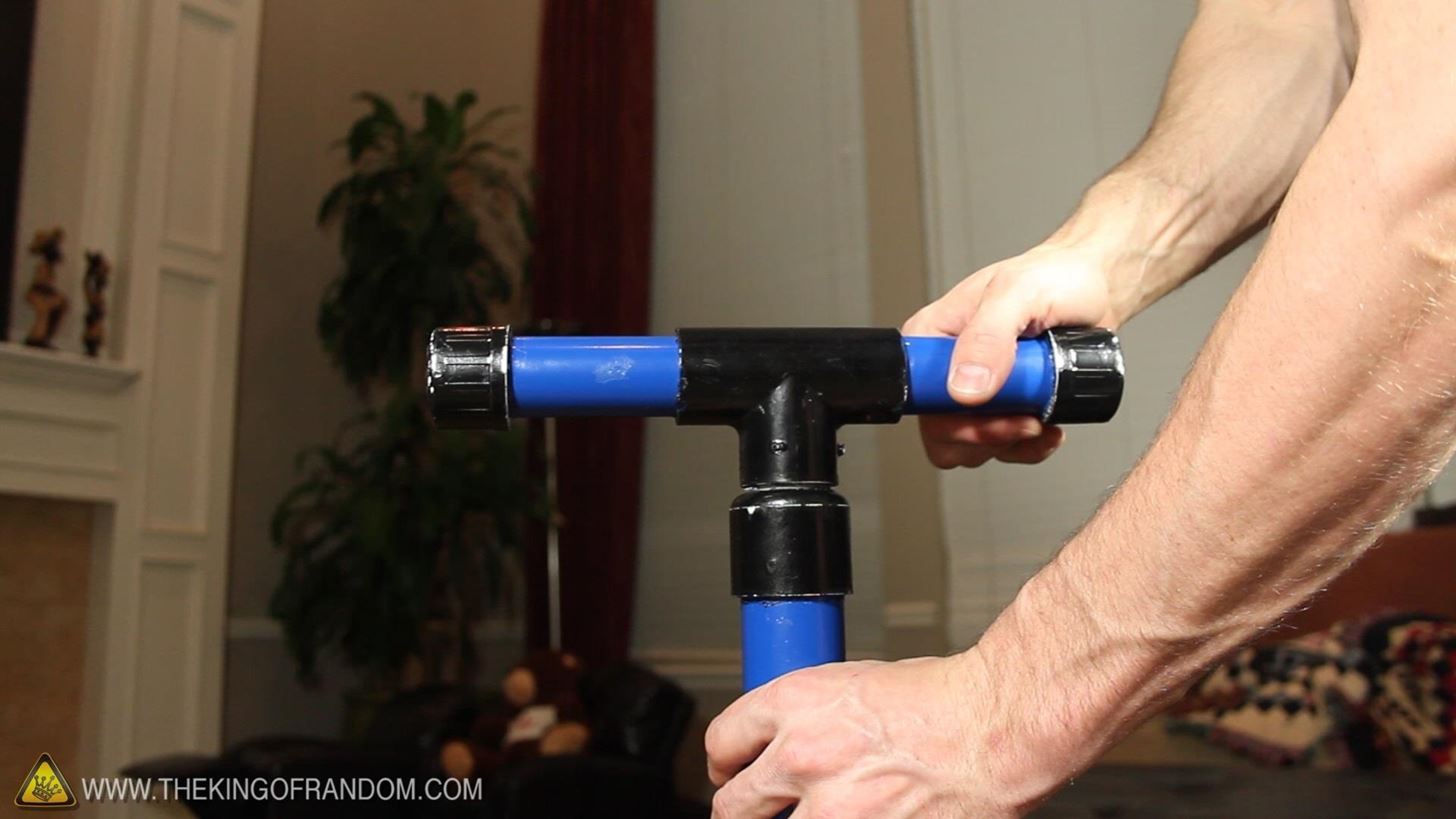
To the bottom of the 1¼" pipe I cemented on the coupling, ¾" reducer bushing, short riser, and threaded tee.
With the 2 O-rings lubricated, the piston should push air-tight into the larger pipe.


The modified slip cap can be cemented on top now, and when the piston is bottomed out, there should just be a couple of inches of pipe poking out the top.
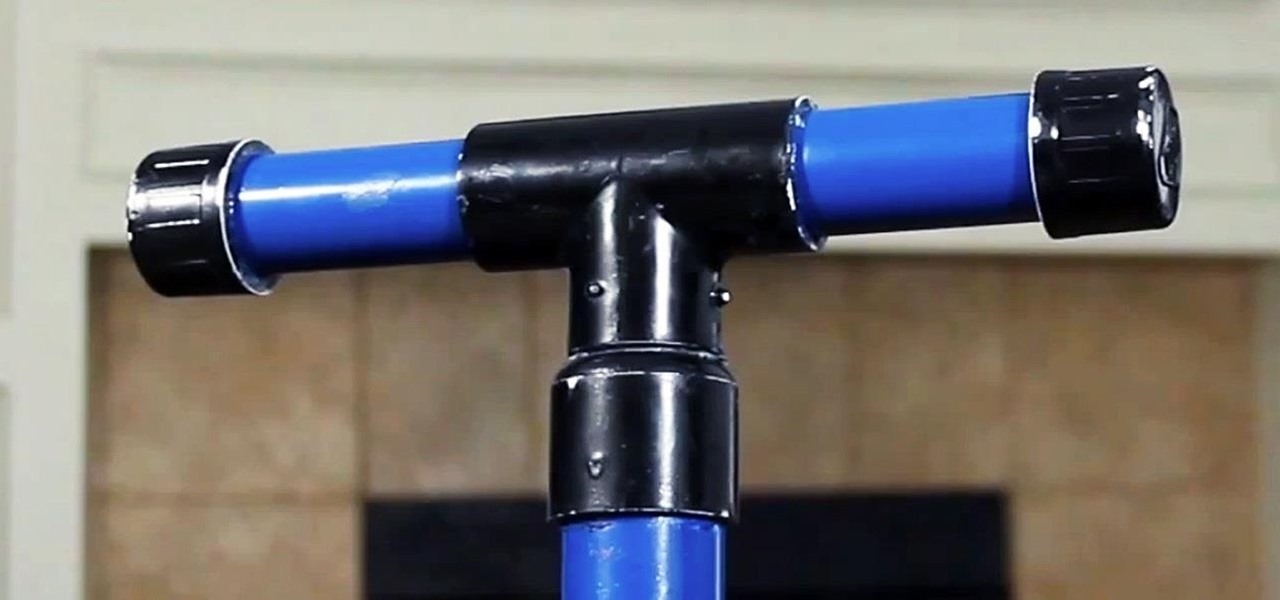
I chose to paint the fittings black, and the pipe blue, just for contrast.

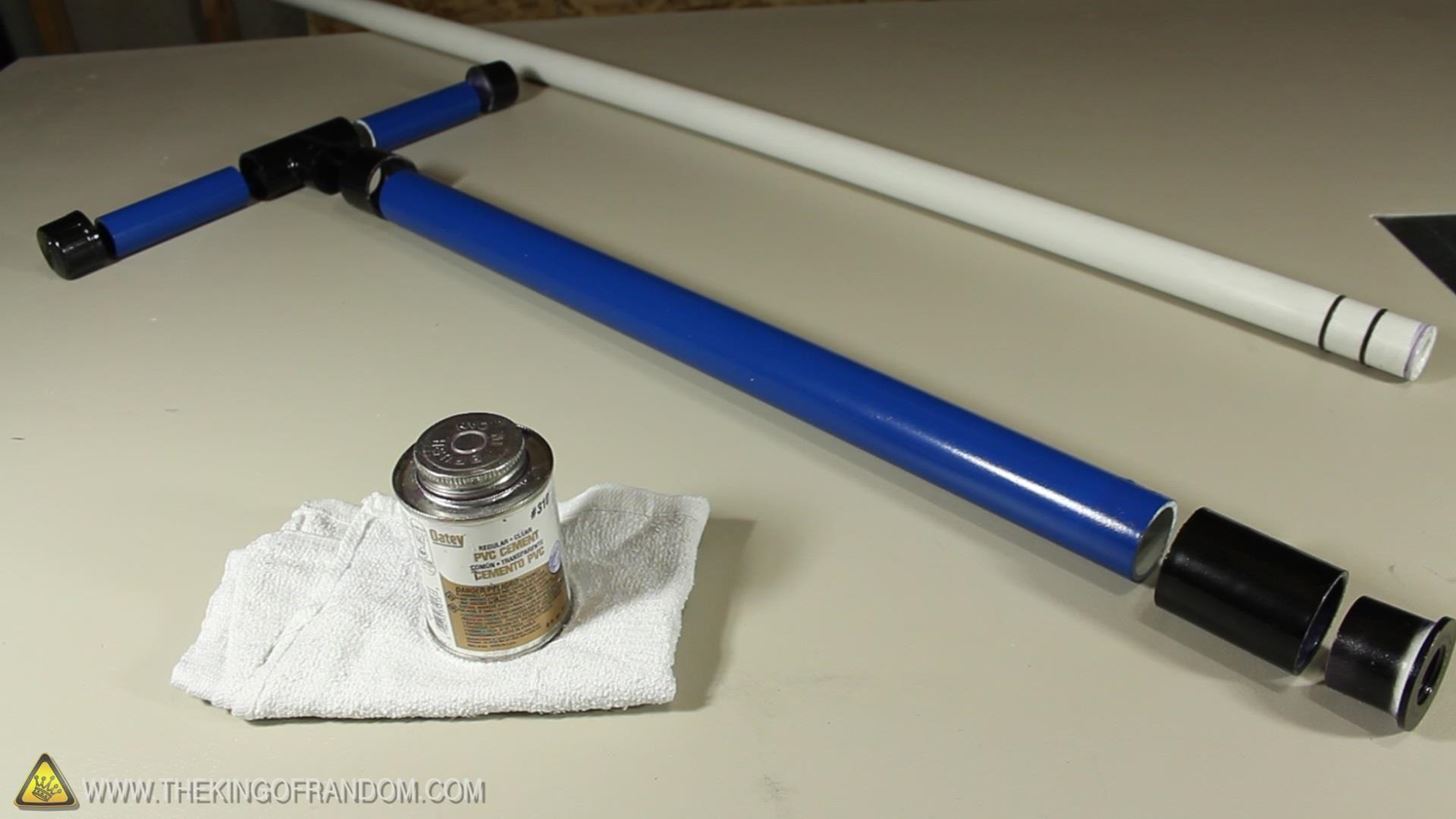
The handle is made from 2 pieces of 4½" x 1" PVC pipe cut from the scraps off of the piston.
Everything is cemented together as shown in the picture, and when the handle is complete, it cements onto those couple of inches of piston pipe sticking out of the hydraulic piston chamber.
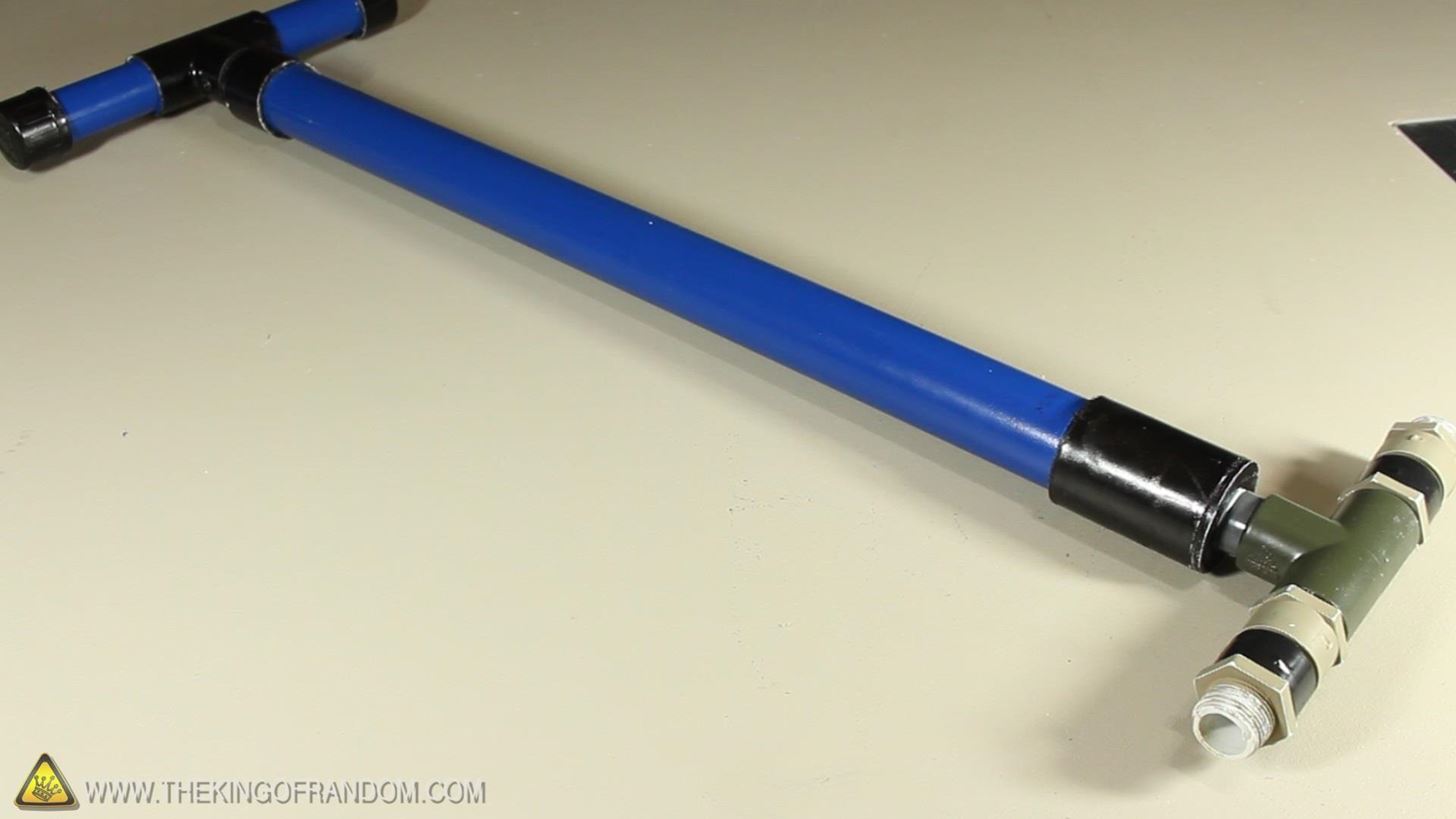
This completes the piston, and adding 2 check valves to the threaded Tee at the bottom will complete the pump!
Note: Make sure your check valves are pointing the right way. :)
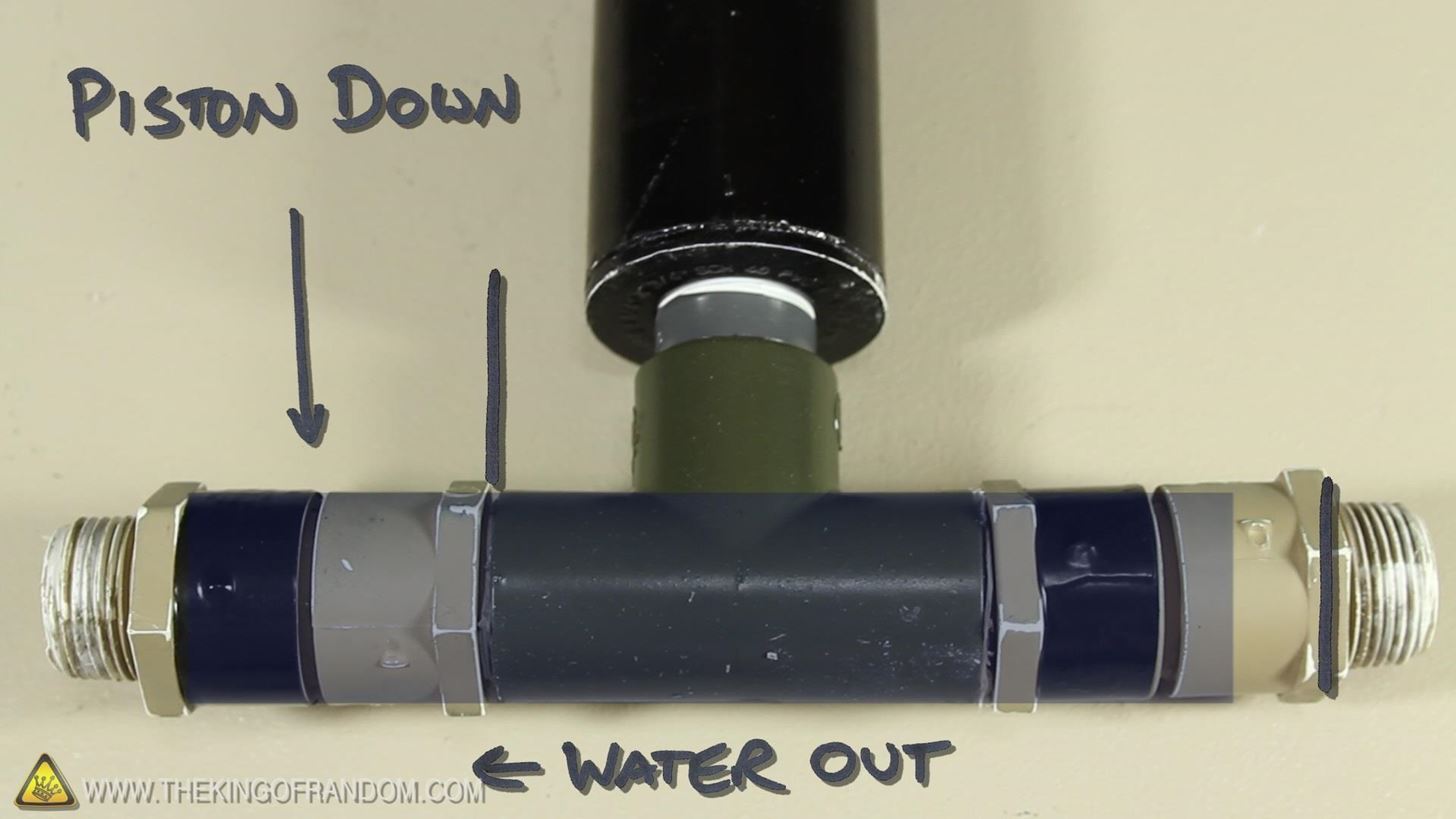
Since the check valves are threaded, they can be moved around, changed out, or positioned in many creative ways. Using additional PVC pipe and fittings opens up many different options. The imagination is the limitation.
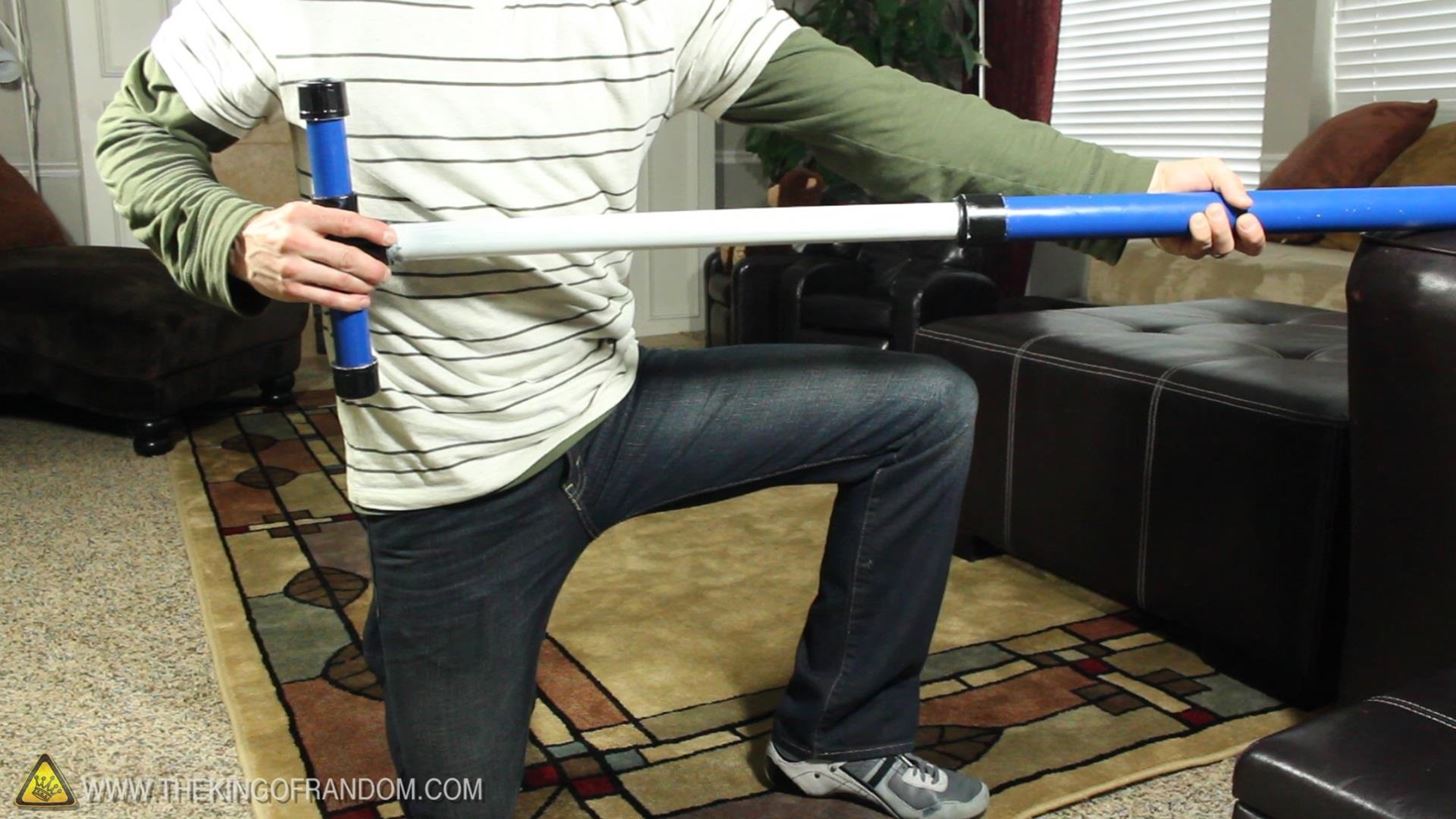
Using Your New Hand Pump
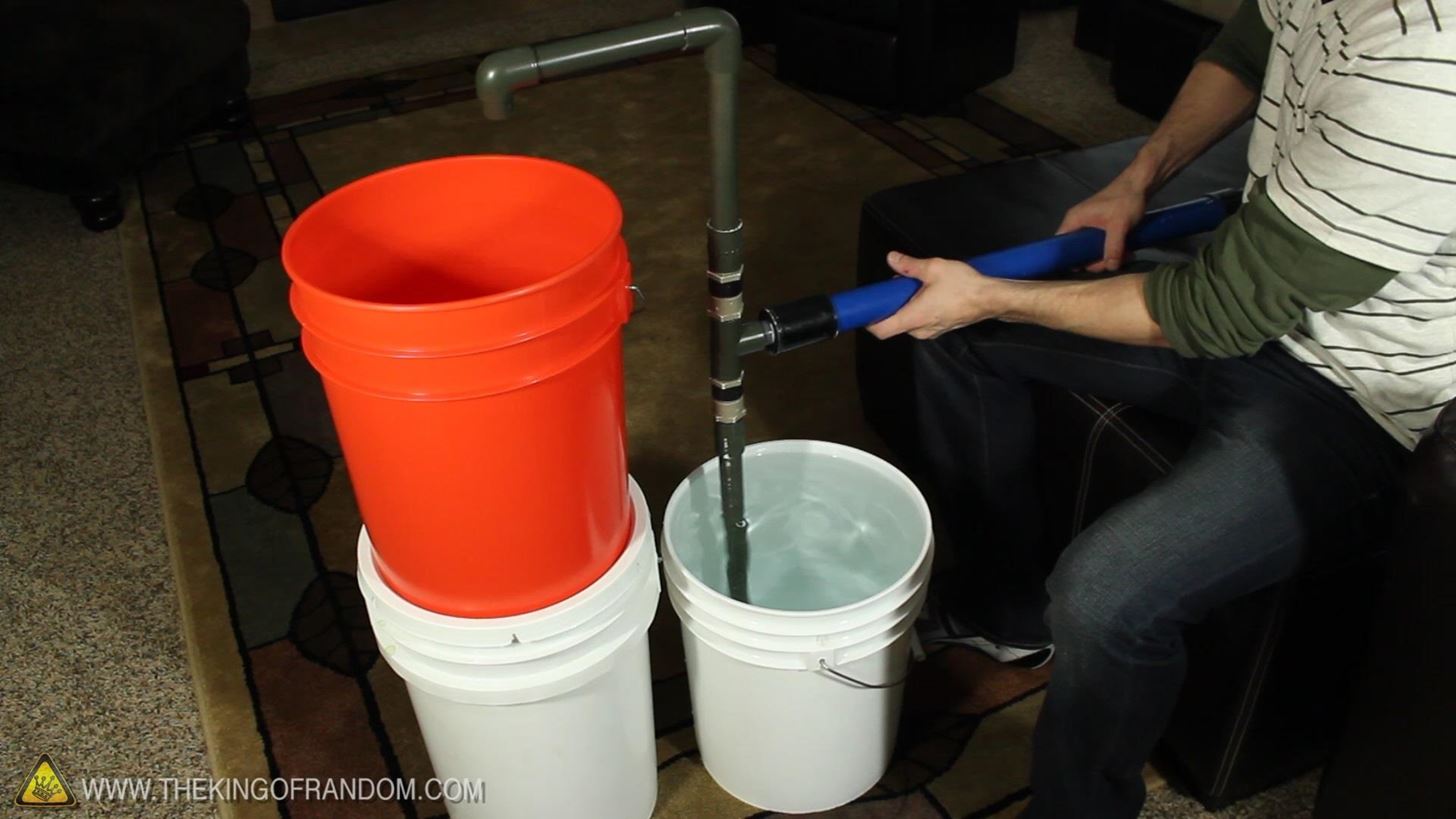
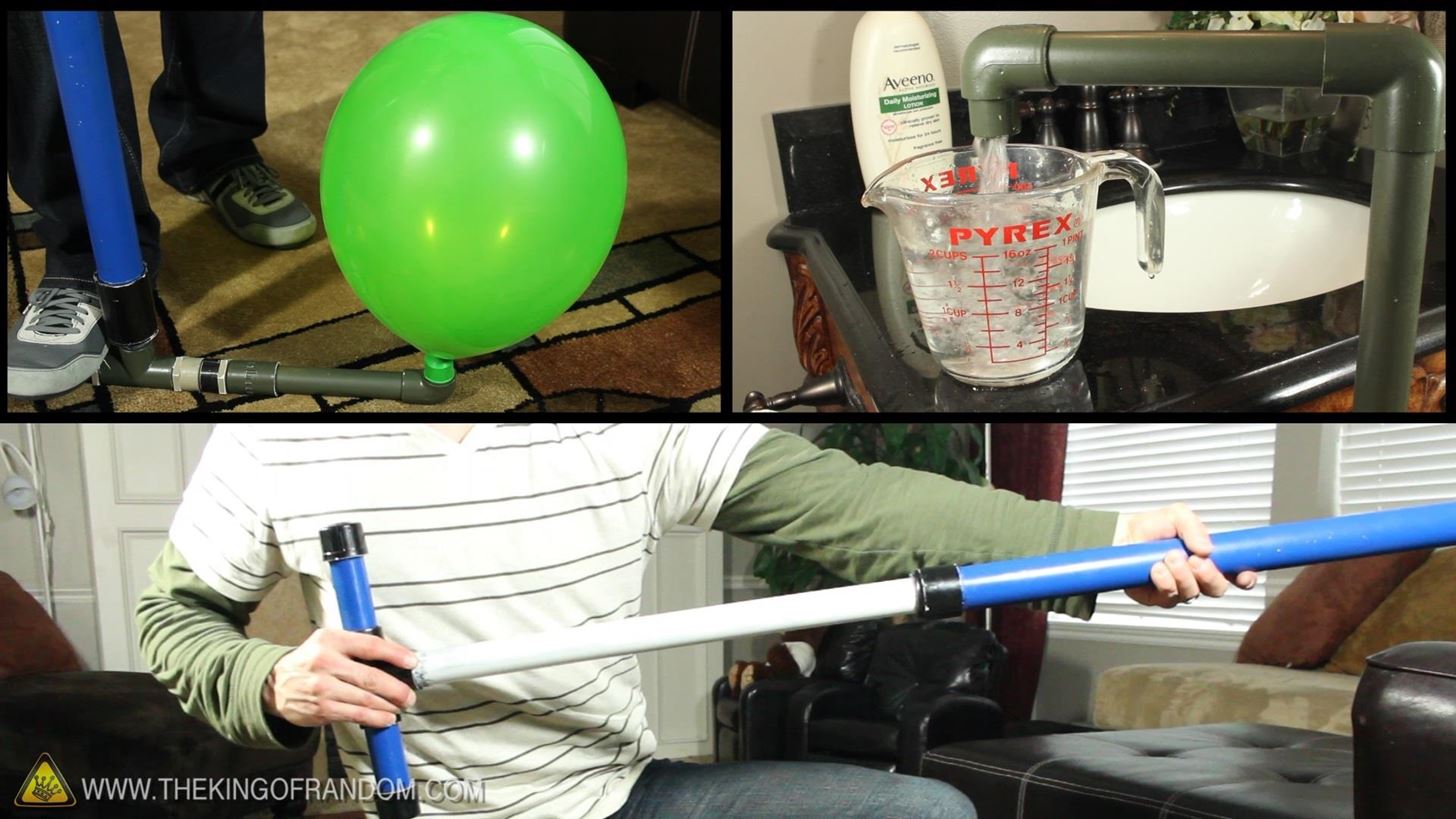
With the vertical pump approach, I could pump around 3 gallons per minute.
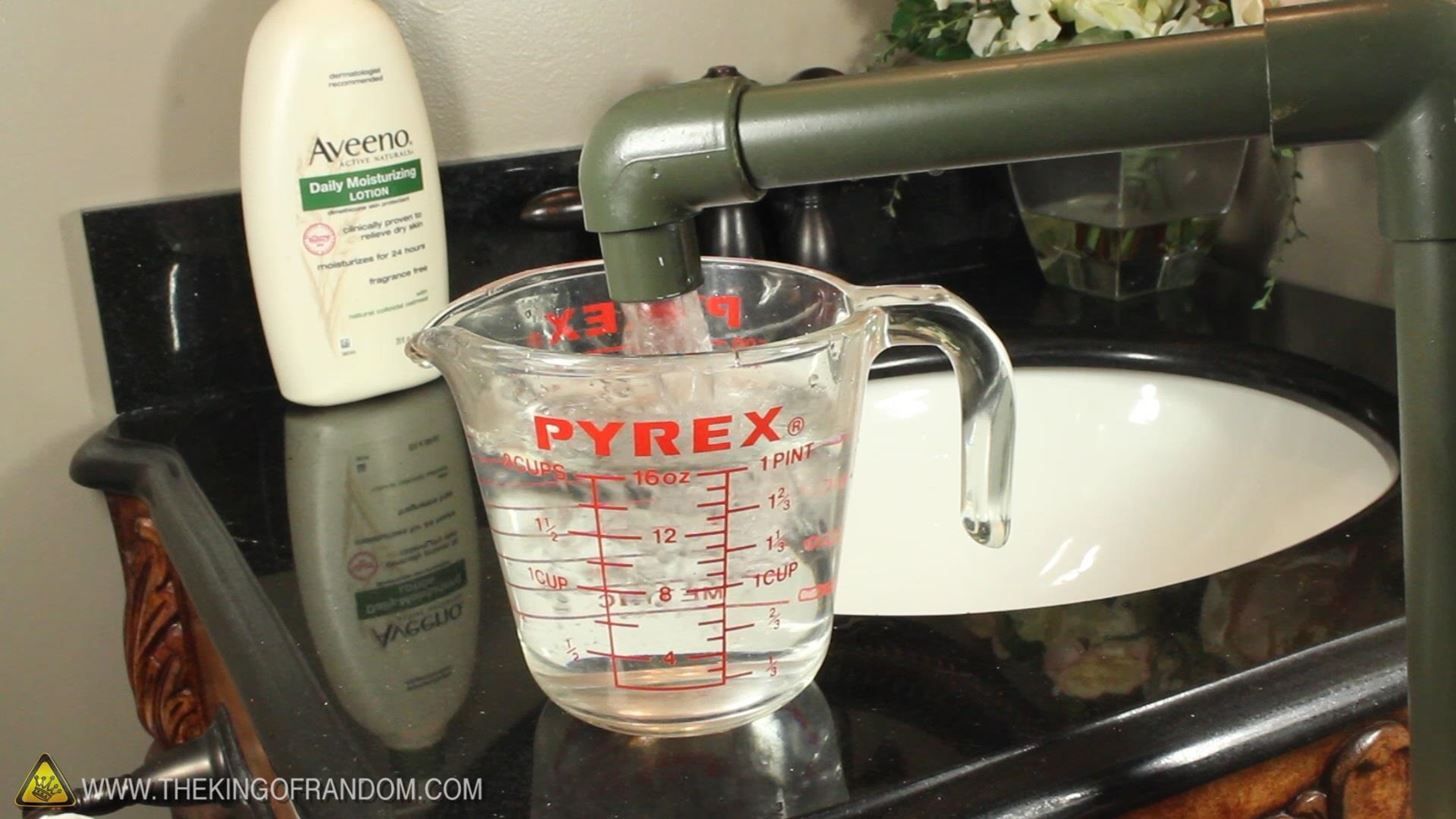
This pump seemed to move just over 2 cups of water per cycle.
You could try making this into a pump to move water vertically, or leverage it with your feet for more of a bilge pump type approach.
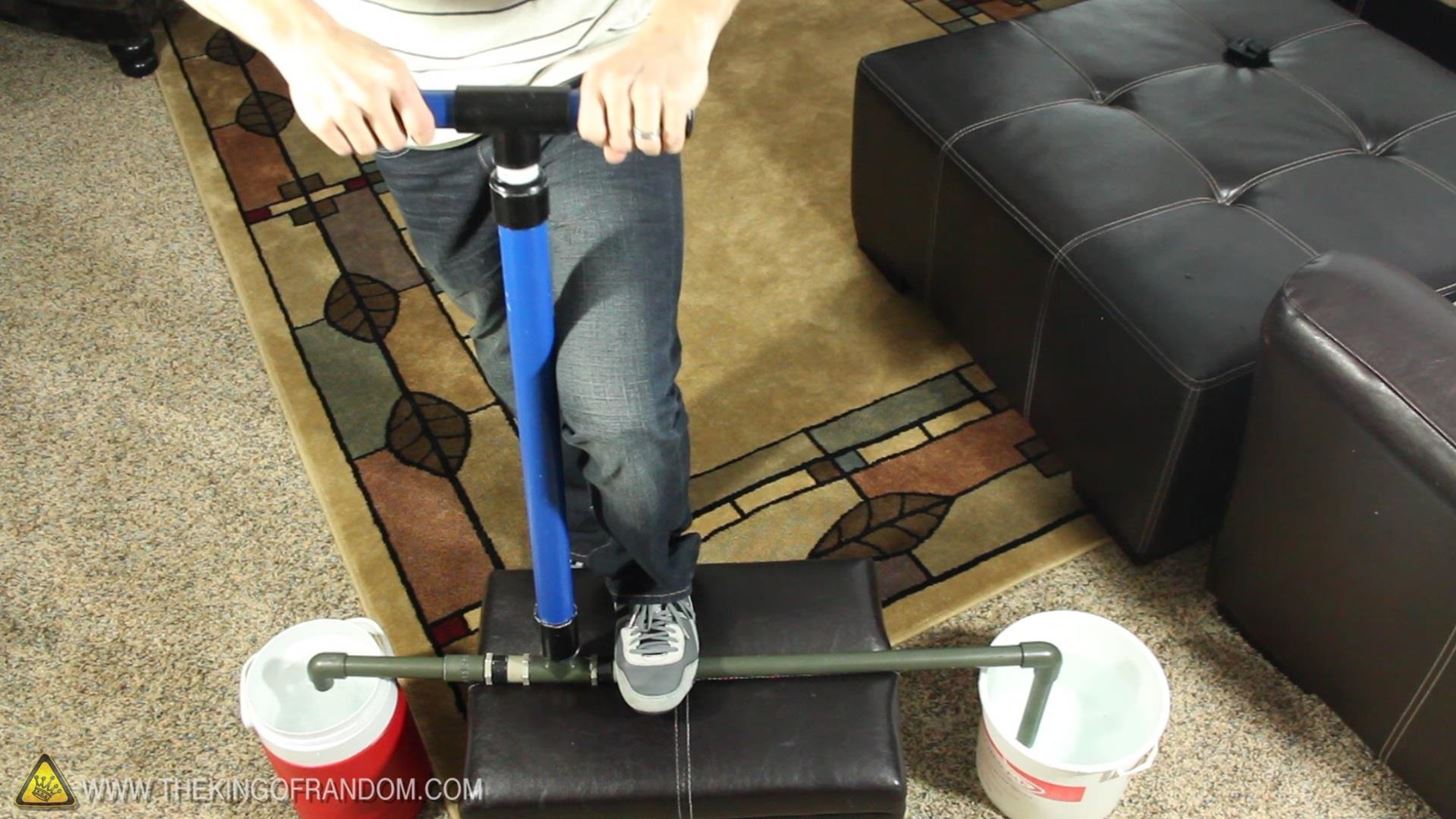
With the horizontal approach, I could move over 5 gallons per minute because I could put my weight into it and move it faster.
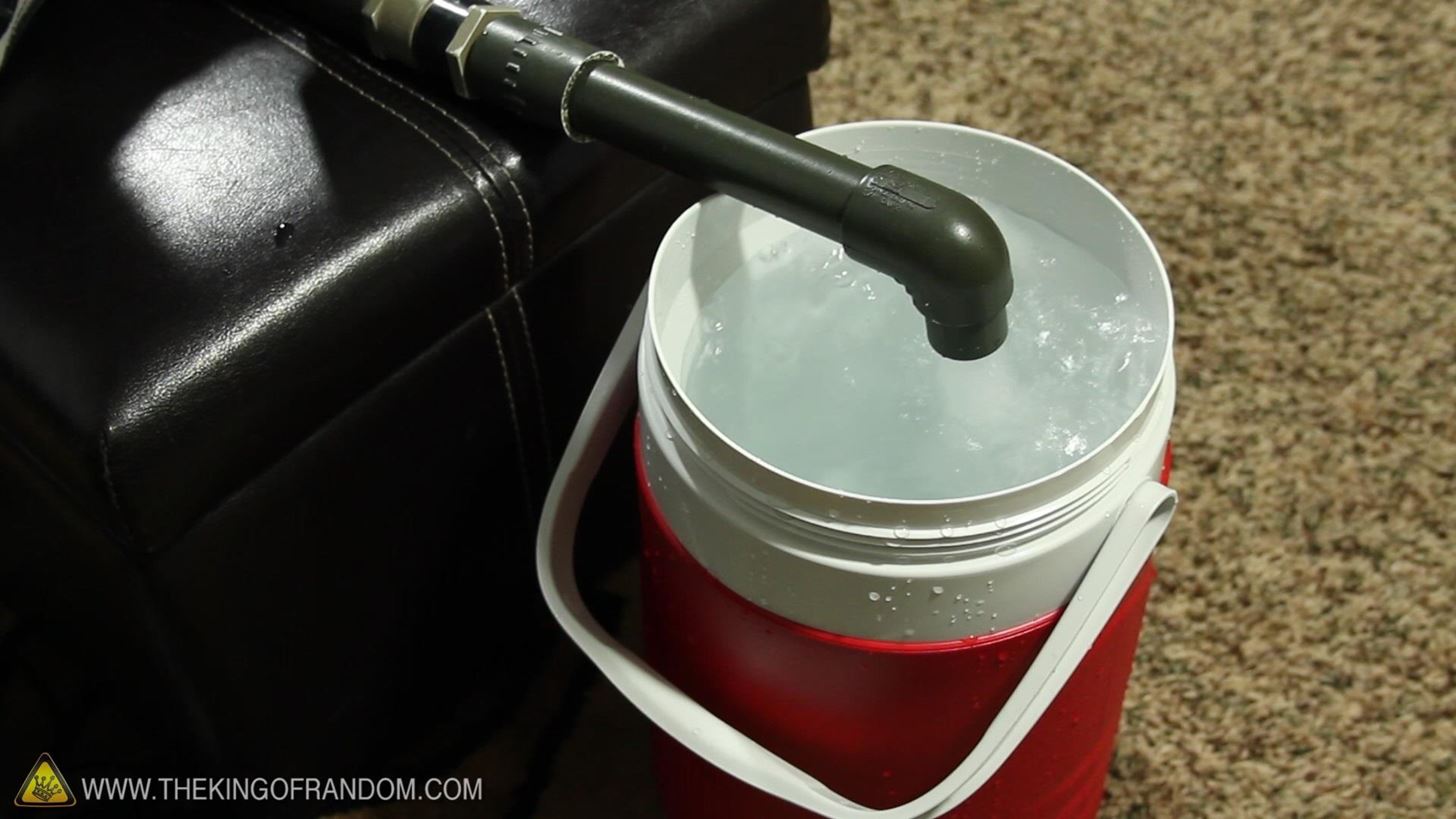
The pump was made for pumping water, but it proves extremely effective for compressing air, as well as creating a vacuum.
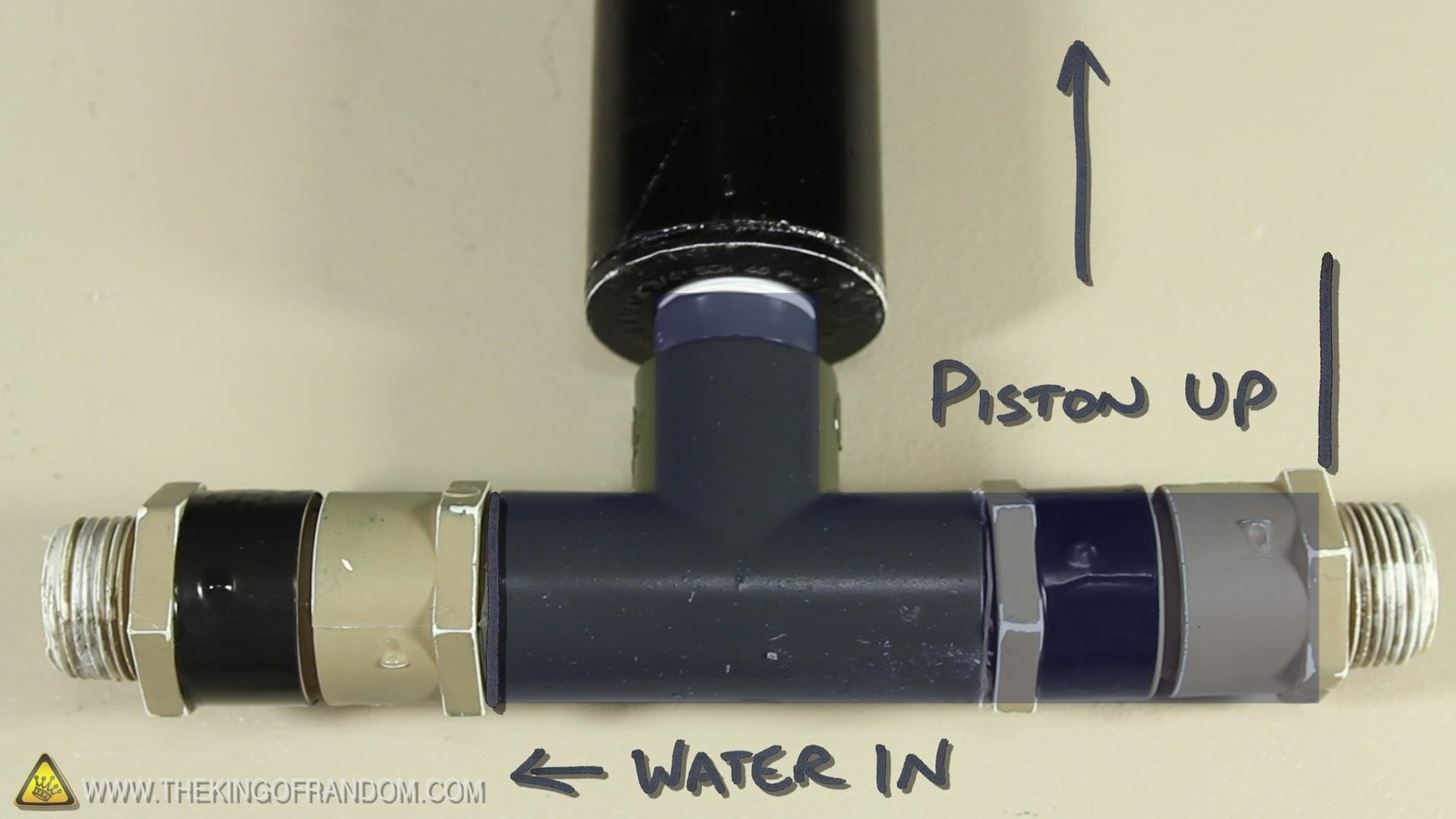
The pump has an intake side, and an outflow side. If you hook up to the intake, you create a vacuum.
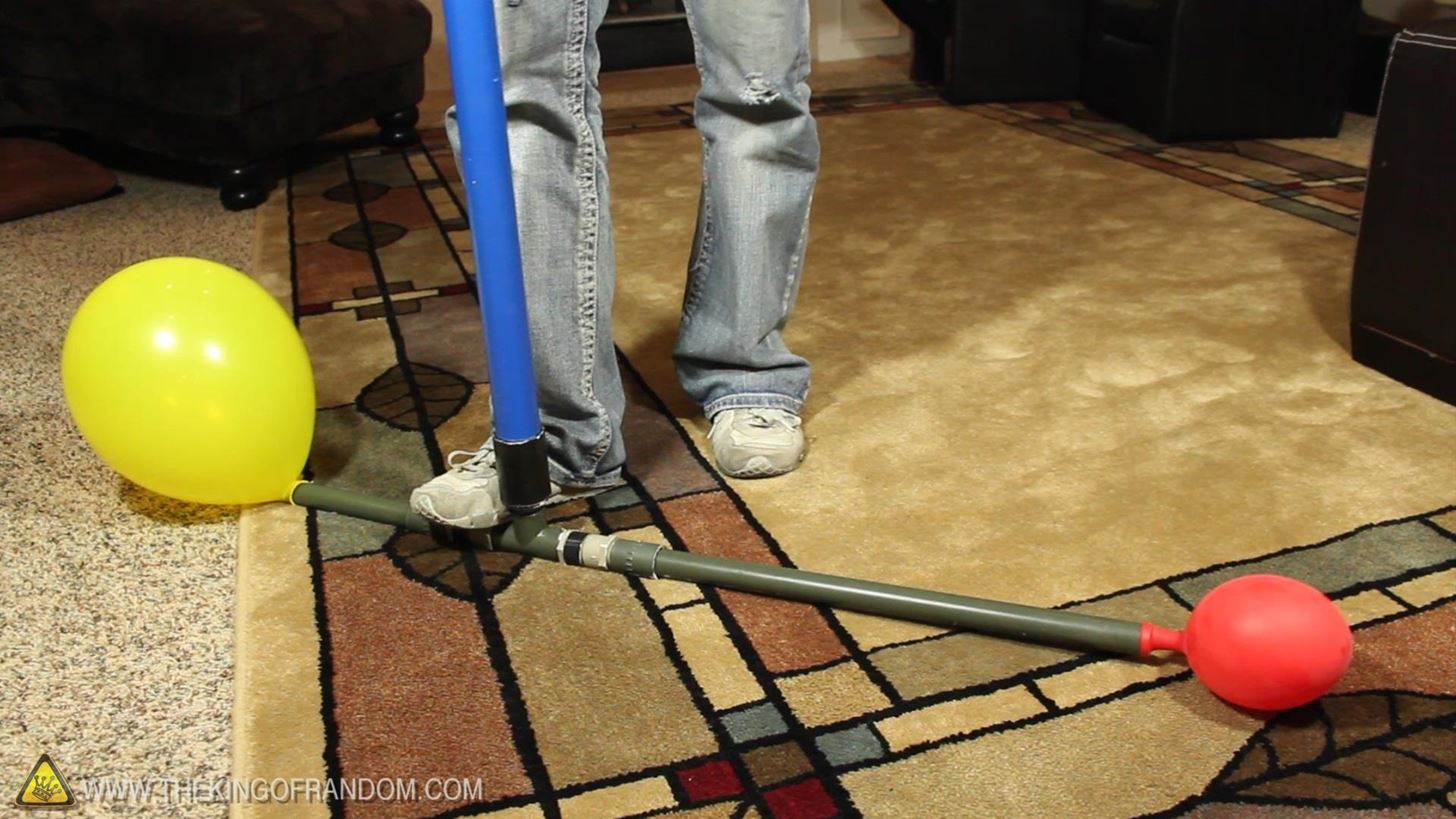
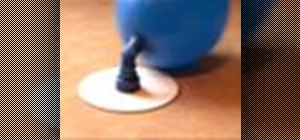
I blew up a balloon and attached it to the intake side, and on every stroke it got smaller and smaller until it was actually sucked inside the tube.

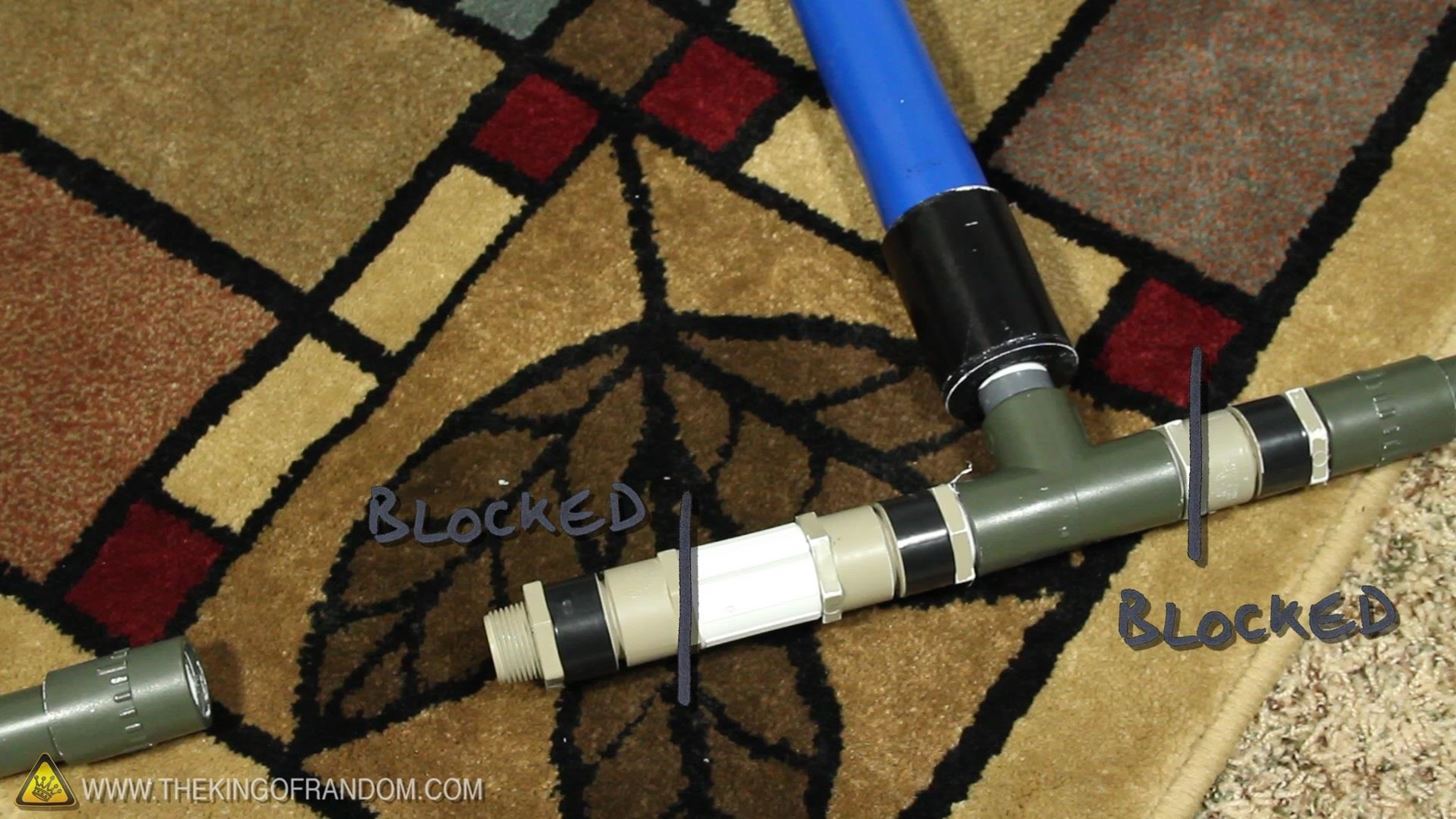
I tried blocking the valves from both directions, and when I pulled back on the piston I was met with a strong vacuum in the chamber, which pulled the piston back inside with considerable force when I let go.
Because the piston isn't physically attached to anything, the handle can rotate a full 360 degrees.
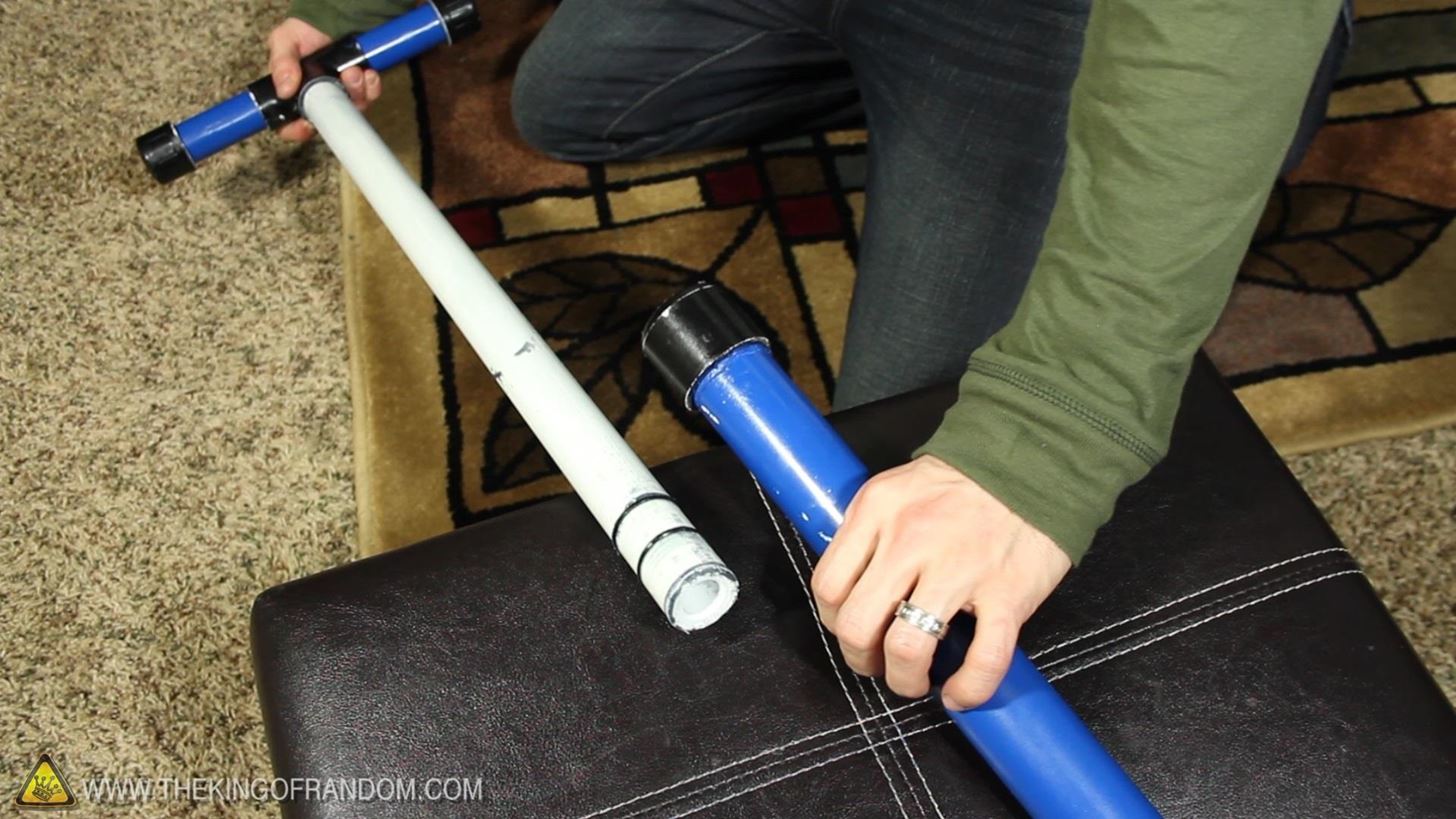
If you need to clean the piston, or add some more lubrication, you can pull the whole handle out like an oversized plunger. It goes back in the same way it came out.
I'm planning to use this piston design in future projects that require pneumatic and hydraulic pistons.
In my testing, the valves work great with air and water. I didn't have any gauges to test the strength of the vacuum so can't say how strong the vacuum would be, but it certainly does create one.
While there are some special tools used to create this pump (table saw and forester bit), I believe with a little creativity the pump could be made just as effectively without them, making this a simple and duplicatable design.
If you haven't seen the video yet, check it out here, and if you liked this project, perhaps you'll like some of my others. Check them out here on WonderHowTo or at thekingofrandom.com.
Just updated your iPhone? You'll find new emoji, enhanced security, podcast transcripts, Apple Cash virtual numbers, and other useful features. There are even new additions hidden within Safari. Find out what's new and changed on your iPhone with the iOS 17.4 update.


5 Comments
Any idea as to maximum pressure you can achieve?
I read the check valve article and it said 50-60#
Just finished building the pvc pump. Here are a few of my thoughts....
The O-ring sizes listed in the photo are WRONG! The #219 will work as the top o-ring, but the piston O-rings should be 2 #123 rings. And I missed the 3/4" plug instead of 1" as in photo.
Also, if on a budget and you don't want to spend over $16 on a forstner bit, try this: Take a 1-1/4" slip coupling, cut off just above the inner rib. Slice off about 1/4" of the 1-1/4" pipe. Sand and slightly bevel inside edges. Drive this piece into the modified coupler to the inner rib (no need to glue).
This keeps the top O-ring in place after assembled. Tap this assembly onto the 1-1/4" X 24" piece until it ALMOST touches the O-ring.
is it possible to make it auto using pressure from water wheel?
Will this lift water from a 30' well?
Share Your Thoughts