
Connecting to your headless Raspberry Pi on the go typically requires a network connection or carrying around bulky peripheral hardware like a screen and keyboard. With the help of an old-school connecting standard, though, you can log into your Pi from any computer using a simple cable. If you don't have a power source, you can also power your Linux distro over the cable at the same time.
If you have ever used an older computer or printer, you might remember those standard RS-232 serial connectors, but there are more current and commonly known interfaces like Ethernet, FireWire, and USB that can connect to a machine's console for diagnostic purposes. We'll be using a USB-to-TTL serial cable, which is much smaller and lighter than the serial cables of old.
While you most likely know what USB is, TTL means transistor-transistor logic, a digital logic solution to process and interpret information. This serial connection is a legacy hardware connector that has been used for decades.
Serial communication takes place over a serial cable and is a linear form of transferring data. That means it sends data bit-by-bit via a communication port like USB. It is a straightforward way to communicate, featuring both a transmitter and receiver, and is also one of the most simple ways to communicate with a device.
While you'll have to connect to your Raspberry Pi running a Linux distro the normal way initially to enable this USB-to-TTL feature, subsequent logins can be done using just your USB-to-TTL serial cable.
The Components for This Guide
- A Raspberry Pi 3, although the Pi 2 and original Pi should also work. You can do this to the Pi Zero and Pi Zero W as well, although you'll need to pick up some male header pins to solder onto the Pi Zero boards.
- A Micro-SD card with a Linux distro on it (like our Kali Linux Raspberry Pi build).
- A USB-to-TTL serial cable to connect your Kali Pi to.
- Finally, a laptop or computer with an open USB port to communicate with the Pi through the cable.
If you choose to grab a serial cable from Adafruit or get stuck during our guide, Adafruit's website also has a good walkthrough on using serial cables.
Now, depending on the operating system running on your Pi and the operating system running on your laptop or computer, there are a few more tasks we need to take care of first before connecting. Let's start with the Raspberry Pi.
Step 1: Installing Prerequisites on Your Pi
Raspbian is the default operating system for the Raspberry Pi, and Raspbian has a Pi module called raspi-config which can help us easily enable the necessary setting we need. This module allows you to enter an almost BIOS-type configuration menu to configure different parts of the Pi's hardware.
First, go ahead and connect to your Raspberry Pi running your Linux distro the way you normally would, either via SSH or with a keyboard, monitor, and mouse. Raspi-config is not installed on all distributions of Linux, so on Debian-based systems like Kali, you will want to open up a terminal and install it by typing the following.
Next, cd to change directories by typing the following.
cd install_raspi-config
Finally, we'll install raspi-config and all the dependencies by running this final command.
sudo sh install.sh
Now, we'll be able to access this BIOS-like menu to modify the GPIO pin settings.
Step 2: Enabling the Connection on Your Pi
When you have satisfied these requirements, boot up your Raspberry Pi with Kali again, however you normally use it, then enable the connection on it by opening a terminal as root and typing:
raspi-config
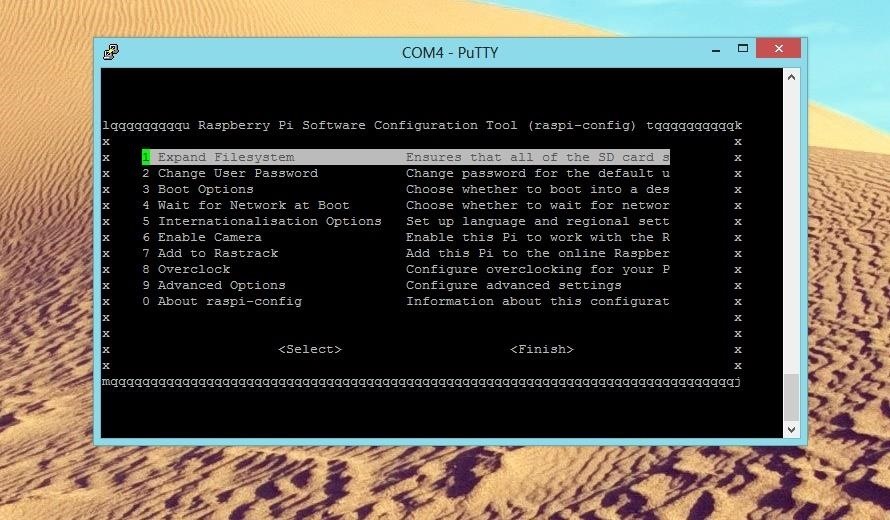
Now a Raspberry Pi Software Configuration Tool will open up a new terminal. We can scroll down with the arrow keys and select option 9 called "Advanced Options."
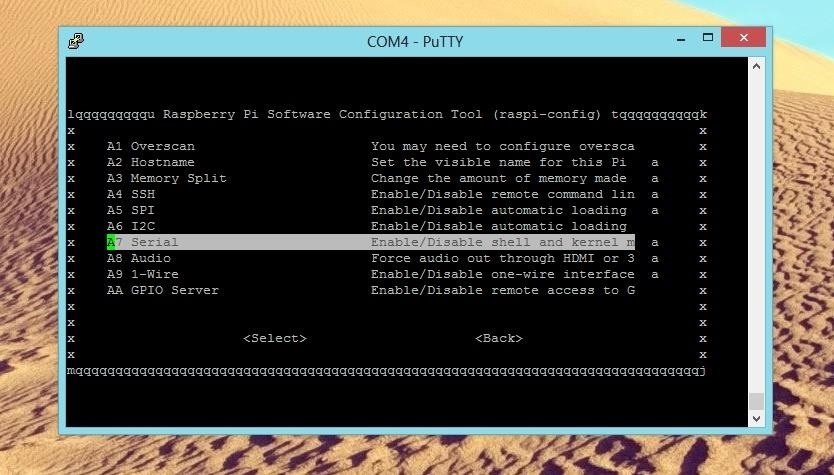
Once we are in the advanced options, scroll down using the arrow keys to "A7 Serial" and press enter. It will prompt you with "Would you like a login shell to be accessible over serial?" Go ahead and select "Yes." After you select that option, it will confirm "The Serial interface is enabled."
The program will send you back to the main menu automatically, and you can go ahead and tap down and select the "Finish" option. After selecting it, the program will ask you if you want to reboot. Go ahead and say "Yes" to reboot your Pi and apply the changes.
Step 3: Installing Prerequisites on Your Computer
Now that our Pi has the needed software, we will need to set up some software on the computer we will be plugging the USB end of the cable into.
In this demonstration, we will use PuTTY, an SSH, Telnet, and serial communication client that works on Windows, macOS, and Linux that will allow us to make the connection. You can download and install PuTTY for your operating system from the project's website, but we'll be using it here for Windows.
We'll also be showing how to use a program called Screen if you're running Linux. If Screen is not included in your distribution of Linux, you can open up a terminal window and type apt-get install screen.
The computer we are connecting to the Pi with will also need some USB drivers for us to properly use the serial connection cable. You can download the necessary drivers for your host operating system from the list below. If you're a Linux user and have recently updated your system, the driver should already be installed.
Step 4: Connecting to Your Pi's GPIO Pins
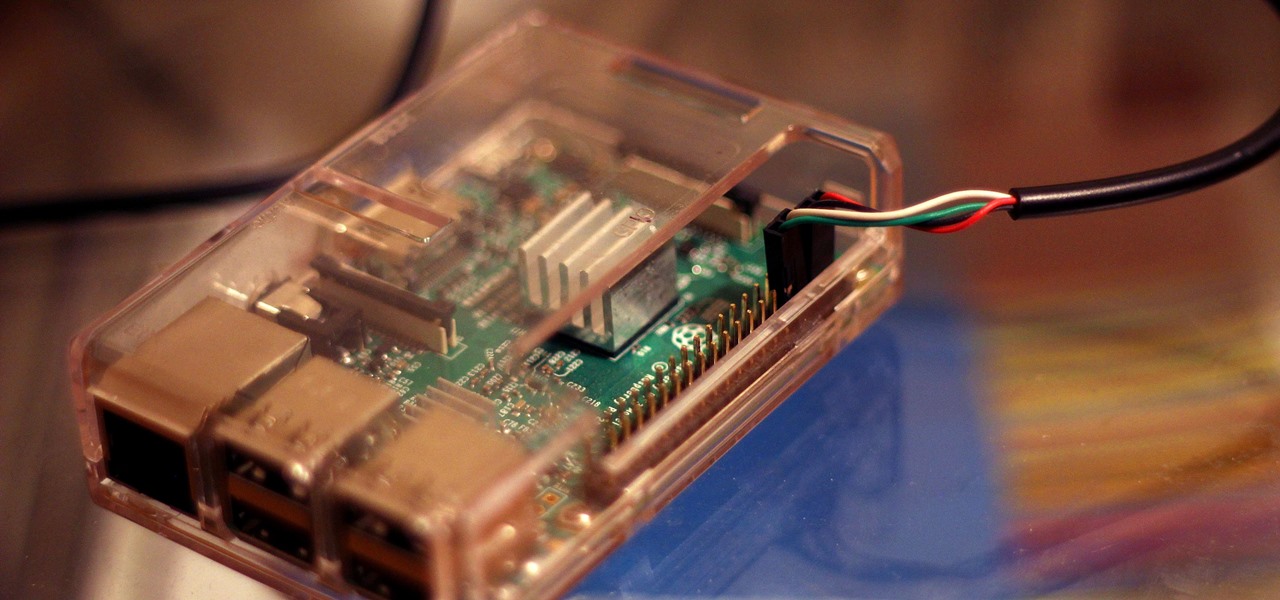
Next, we will move to the physical aspects of this setup. Make sure that your Pi is not powered on and has the Micro-SD card inserted. Break out your serial cable and connect the following cables to the appropriate pins using the diagram below. If you need a more detailed view, you can check out an interactive pin diagram.
- Connect the white cable to GPIO pin 8. The white cable will be our transmission (TXD) communication.
- Connect the green cable to GPIO pin 10. This is our receiving (RXD) communication.
- Connect the black cable to GPIO pin 6. This is just a ground cable to ensure that if a sudden electrical surge happens, none of the electronic components on the Pi are fried.
- Connect the red cable to GPIO pin 4. This one is optional and will provide 5 volts of power and communication from just the serial cable itself. It's important not to power the Pi with the Micro-USB power cable while the 5-volt pin on the GPIO is also powering the Pi at the same time.

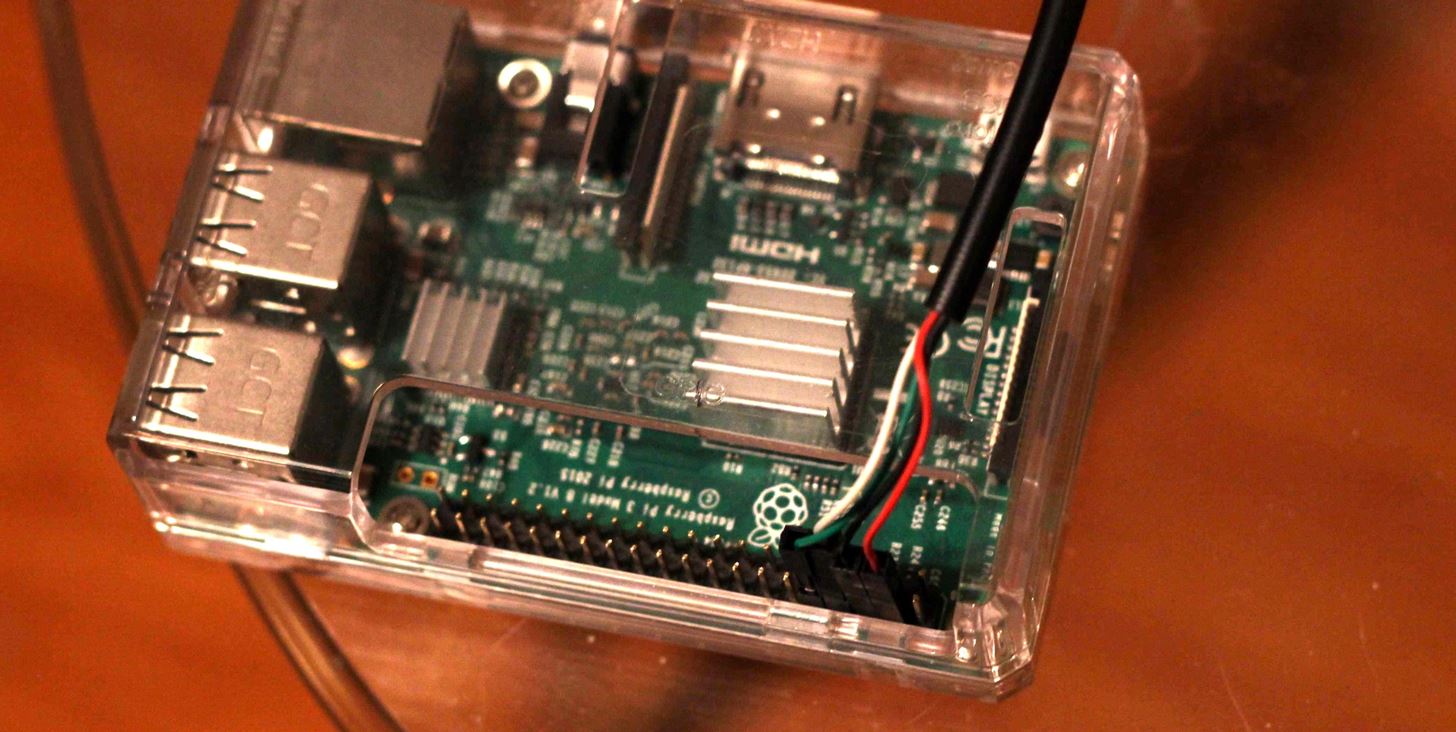
Remember, if you use all the USB ports on the Raspberry Pi with the 5-volt line connected, depending on what you plug into the USB ports, you may get power fluctuations on the Pi. You can see how everything is supposed to look in the image below.
Step 5: Starting the Connection
Now that all of that is finished, both our computer and Raspberry Pi are ready to talk to each other! Go ahead and connect your Raspberry Pi to your computer with the USB-to-TTL serial cable.
Method 1: Using Windows
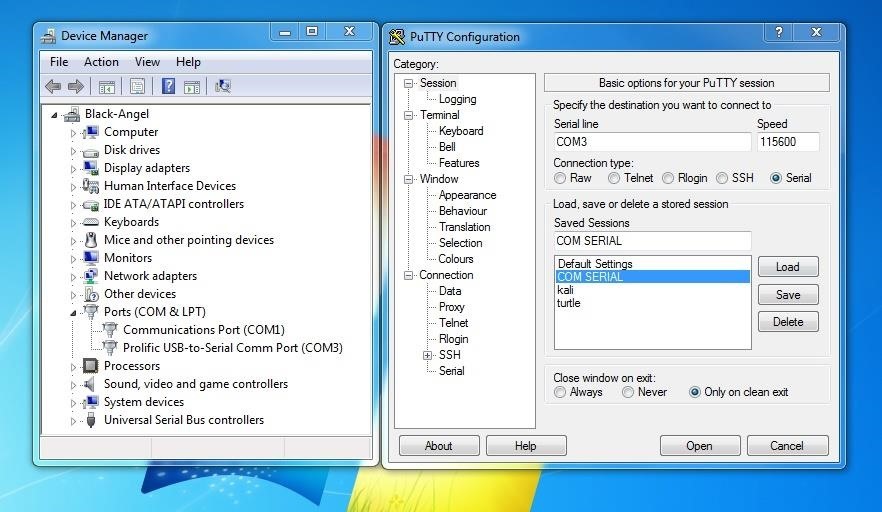
If you're using a Windows device, we want to open up "Device Manager," then drop-down the "Ports" tab, and look for what port number Windows have assigned our USB. In the screenshot below, Windows assigned my Raspberry Pi COM3.
Next, we open up PuTTY on Windows, press the "Serial" radio button, then type in whatever COM number windows gave you. Change the Speed field to 115600. We want to change the speed because the USB platform needs more bits to be transmitted when we enable the connection.
After that is done, go to the bottom right and press "Open" and a terminal window will open asking for the username and password for the Pi if the connection is successful. You may have to hit enter if you initially see nothing. If you haven't changed it, the login in Kali is "root" and "toor" as default.
Method 2: Using Linux
On your Linux device, plug in your Pi with the USB-to-TTL serial cable, and after it has had time to boot, open up a terminal window. As for connecting to your Pi on Linux, it will be almost the same as on Windows, but when searching for the USB, we want to type ls /dev/ and look for something similar to ttyUSBx.
Whatever number is at the end of the output should be the USB-to-TTL serial cable identifier for the Pi.
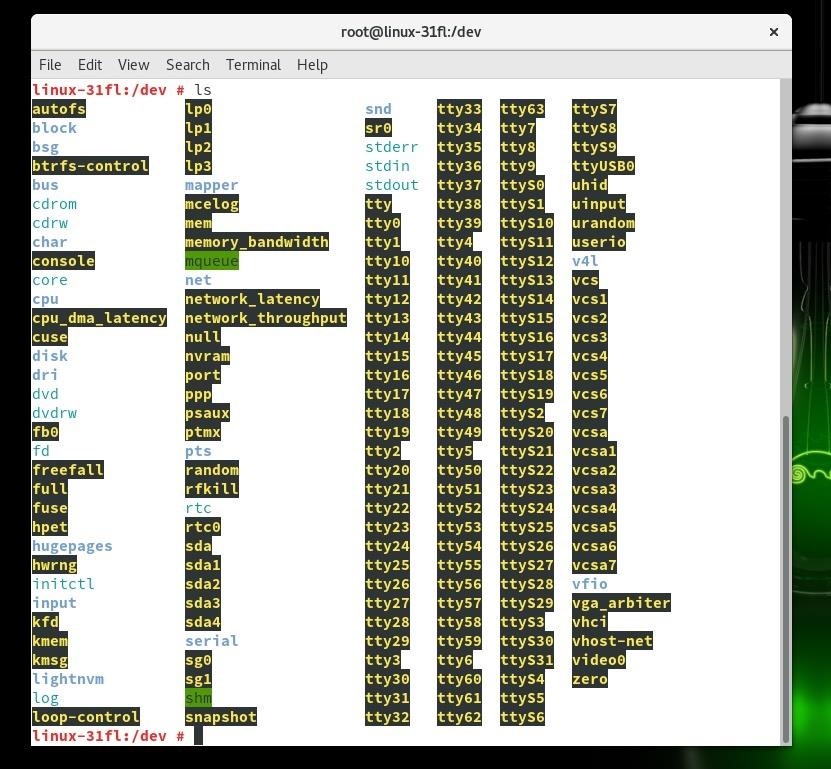
If you got a different number at the end of ttyUSB, make sure to swap that out in the following command, and hit return to connect to the Pi.
sudo screen /dev/ttyUSB0 115600
A new terminal window will pop open, again asking for your username and password for the Pi. Go ahead and attempt to log in.
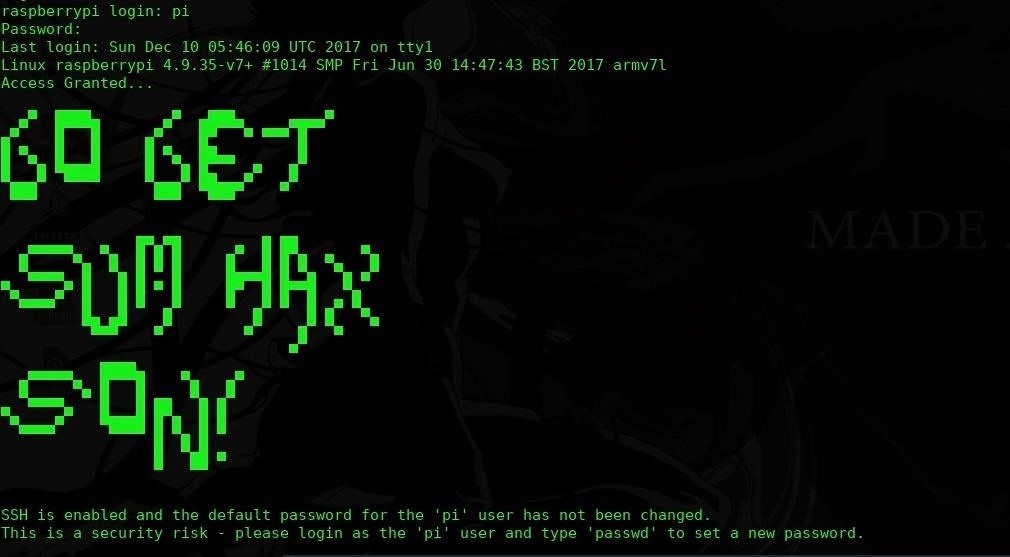
Success! If it works, you should see your Pi's message of the day (MOTD) screen to confirm you've logged in. Your MOTD screen may be less customized than mine.
One Cable to Rule Them All
With just a single cable, we are now able to both power and log in to our Pi quickly and conveniently from anywhere we want. All of this is possible without the burden of constantly carrying peripheral devices to accompany the Pi, giving you more freedom to deploy your Kali Linux environment.
If you're not using your cable to control your Pi, this TTL cable is also great for hacking Wi-Fi routers to install DD-WRT or other custom operating systems — or almost any 3.3-volt logic serial port you want to interface with.
If you have any questions, you can leave a comment here or send a message on Twitter at @Nitroux2. And make sure to stay connected and check out our social media accounts!
Just updated your iPhone? You'll find new emoji, enhanced security, podcast transcripts, Apple Cash virtual numbers, and other useful features. There are even new additions hidden within Safari. Find out what's new and changed on your iPhone with the iOS 17.4 update.


4 Comments
thx!
"this TTL cable is also great for hacking Wi-Fi routers to install DD-WRT or other custom operating systems"
Hum ... tell me more
what do you want to know?
This is just a serial connection, not SSH.
Share Your Thoughts