
Project Overview
Have any old school floppy drives lying around? Get hacking... and transform them into an electronic orchestra!
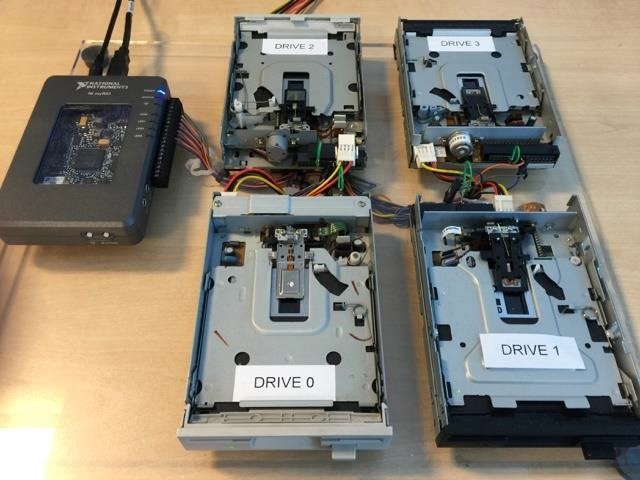
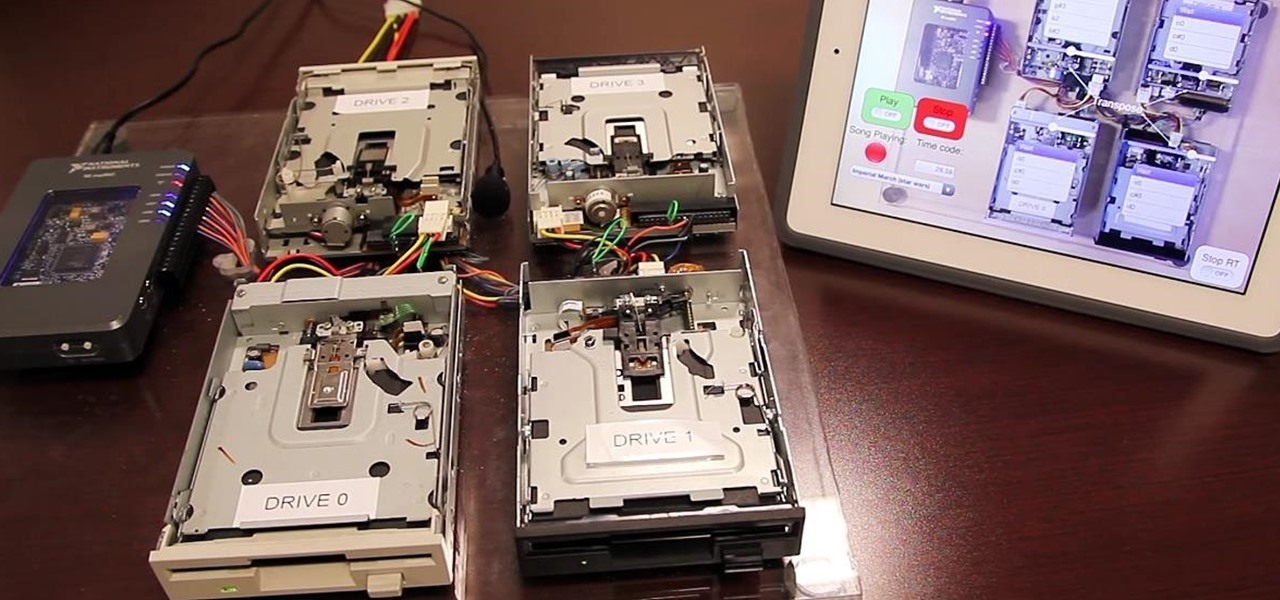
This project uses a myRIO embedded controller and four floppy disk drives. The myRIO effectively plays the disk drives like musical instruments, by stepping the disk drive's integrated motors at specific frequencies.
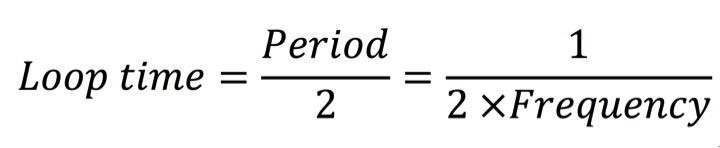
By referencing this table, I developed a LabVIEW VI (which runs on the myRIOs real-time processor) that converts a musical note (such as a C4) in to a wave frequency. For example, the note C4 would be a frequency of 261.63 Hz. This frequency value is then passed to the myRIOs on-board FPGA, which generates a digital pulse train used to control the floppy drive motors. To generate the pulse train, I used LabVIEW to create a simple FPGA personality that inverts the digital true/false within a loop, but I dynamically set the loop timing to be half the period of the requested frequency value.
Note: the period has to be halved, because one loop cycle would be true and the next cycle would be false. Therefore, two loop cycles is equal to one wave period. See the formula below.
The next task is to change the motor direction when the floppy drive's read head reaches the end or the start of the disk. To ensure that the myRIO never tries to drive the read head beyond the start/end of the disk, I implemented a custom counter on the FPGA, to constantly monitor the position of the read head and invert its direction as appropriate.
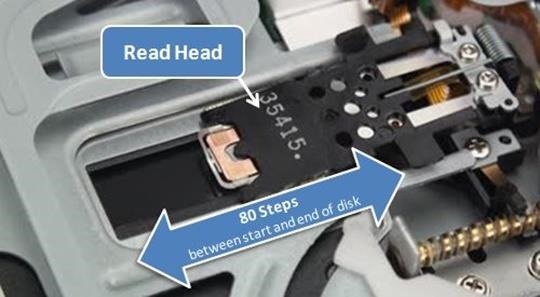
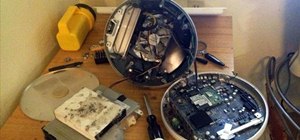
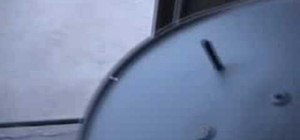
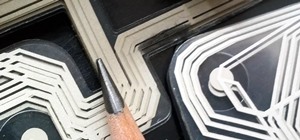
A bit of ancient history... floppy disks are made from a thin piece of plastic coated with a ferromagnetic material, which is magnetized to retain data. More specifically, the disk is divided into 80 data tracks arranged in concentric circles, like the rings on a tree.
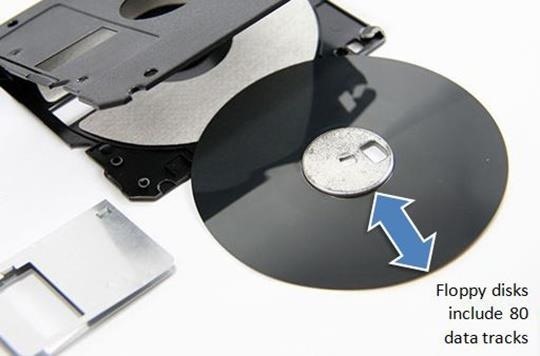
Therefore the floppy drive's integrated motors are designed to step the read head through each of these 80 tracks. Using this information, I created a custom counters on the myRIO FPGA to ensure that the direction of the motor changed when it reached the start or end of the disk. So, for values 0-79 the read head will go forward (writing a digital true on the direction line of the floppy drive), then for 80-159 the read head will go back (a digital false to the direction line).
Finally, after the myRIO has finished playing a song, the read head must be return back to the starting position, by driving the motor back the remaining steps. This can be done quite simply using the custom counter that is already created.
This setup is then duplicated for how many drives you have to wire to the myRIO. The ability to create/duplicate many parallel tasks is one of the major benefits of an FPGA.
Now that the drives can me sent a tonal frequency and produce a musical note, the next part of the project was to teach the myRIO some musical scores! To do this, I chose to use MIDI files. To quote Wikipedia: "A MIDI file is not a recording of actual music. Rather, it is a spreadsheet-like set of instructions".
A MIDI file has up to 15 tracks of messages, each representing a separate instrument within the song (e.g. piano, synth, guitar, bass, etc.). Each MIDI message includes channel number, the note to be played, note start time and note duration. These messages can then be turned into arrays of notes for each channel on the myRIOs realtime processor, which can then be passed down to the FPGA.
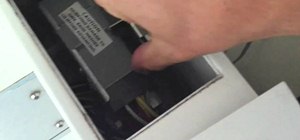
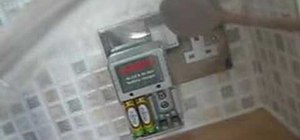
The wiring requirements of myFloppyDriveQuartet are quite simple, because each drive needs just two digital lines—one for step and one for direction. You also need to short the drive select pins and connected the ground pins back to DIO ground of the myRIO.
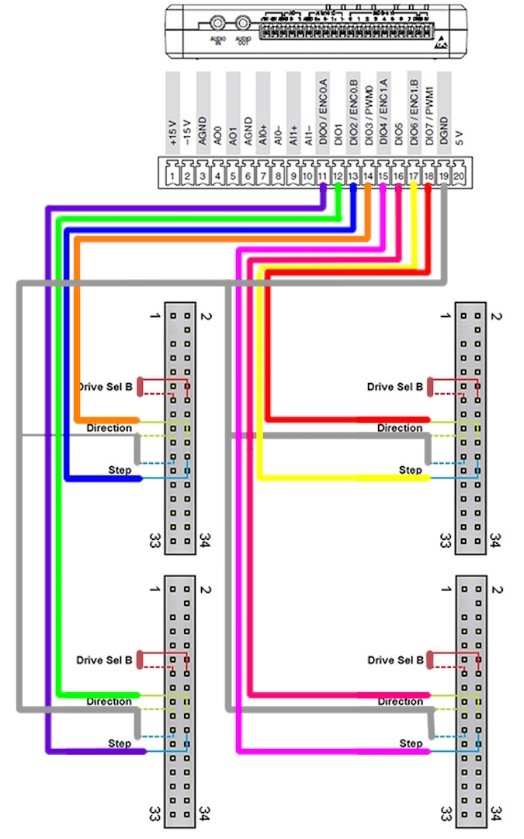
Each drive will also need 6 volts for power.
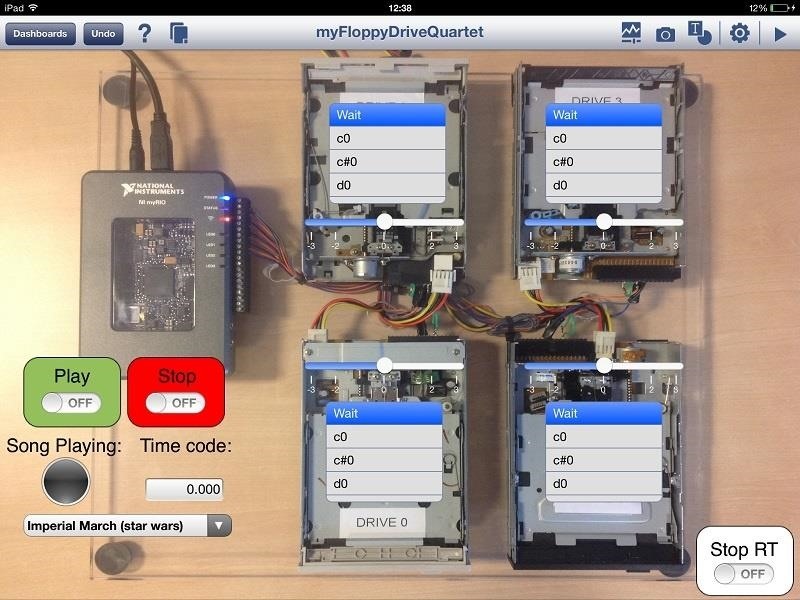
Now that the embedded software (both real time and FPGA) is developed and the hardware wired, there is one final piece of the puzzle... the GUI (graphical user interface). To control myFloppyDriveQuartet (select the music track, start/stop the floppy drives, transpose music notes etc.), I created two user interface options.
PC/Laptop Interface: a simple LabVIEW VI which communicates data from a front panel to a library of network-published shared variables hosted on the myRIO
Tablet Interface: I created a portable GUI for use with Apple iPad and Android tablets, using the free NI Data Dashboard app. This was a very simple process that required no programming what so ever. As the Data Dashboard GUI connects to the same network-published shared variables, you can use the PC or Tablet GUI without modifying the code running on the myRIO.
Steps to Implement or Execute Code
- Download the source code from the NI Community page and wire up the drives (as described above).
- Connect your myRIO to the computer and power.
- Run the RT VI.
- Run the Hose VI.
- Choose a song and click play.
- Once that is working, you can then turn that in start-up VI and use the DataDashboard app to select music with out a computer connected.
Requirements
Software:
- LabVIEW for myRIO 2014
- Data Dashboard (optional)
Hardware:
- myRIO
- Floppy drives (more the better)
- A 6V power supply for the drives (1 amp for each drive)
Useful Resources
A Bit About the Developer
My name is James Willis. I'm a student from Cardiff University studying electrical and electronic engineering, currently on my placement year working as a Applications Engineer at National Instruments. If your interested in doing a placement at NI, have a look at this page.
Just updated your iPhone? You'll find new emoji, enhanced security, podcast transcripts, Apple Cash virtual numbers, and other useful features. There are even new additions hidden within Safari. Find out what's new and changed on your iPhone with the iOS 17.4 update.


Be the First to Comment
Share Your Thoughts